
It’s Saturday and time for our Create with Stamping Friends Blog Hop. This week our theme is “In the Spotlight”. We are showcasing the spotlight technique…highlight one area of a… [Read More]
CSF812 – Pansy Patch

It’s Thursday and you know that means it is time for a Create with Stamping Friends Thursday Challenge. Isn’t this a pretty color combination? PANSY PATCH When the retirement lists… [Read More]
CS135 – Flower Cart

Welcome to Create with Stamping Friends’ Creatively Simple Challenge! Each month Debbie and I will pick a theme for our simple cards. This month the theme is “Nature” cards. Stampin’… [Read More]
40% off STAMPIN’ UP! CARDSTOCK SALE!

Cardstock prices are going up in May with the new Annual Catalog, enjoy my personal sale of 40% off ANY Stampin’ Up! Cardstock now! ORDER EARLY as some colors may… [Read More]
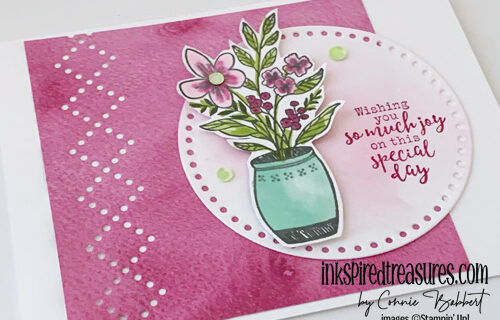
IM326 – Planted Paradise

Welcome to our Create with Stamping Friends Inspiration Monday challenges. This week’s inspiration challenge is set of potted plants! PLANTED PARADISE The Planted Paradise stamp set was the obvious choice… [Read More]
Saturday Blog Hop – Texture Time

It’s Saturday and time for our Create with Connie and Mary Blog Hop. This week our theme is “Texture Time”. We are to feature a type of texture…embossing folder, paste,… [Read More]
CCMC811 – Fluffiest Friends

It’s Thursday and you know that means it is time for a Create with Connie and Mary Thursday Challenge. It’s another great sketch challenge this week! I love sketches as… [Read More]
CS134 – Everyday Details
Welcome to Create with Connie and Mary’s Creatively Simple Challenge! Each month Mary and I will pick a theme for our simple cards. This month the theme is “Birthday” cards. … [Read More]
