I'm taking a little break from fall and Halloween cards to show you what one of my classes made last month. I call it Frosted Impressions and I love the look on this Christmas card!
.jpg)
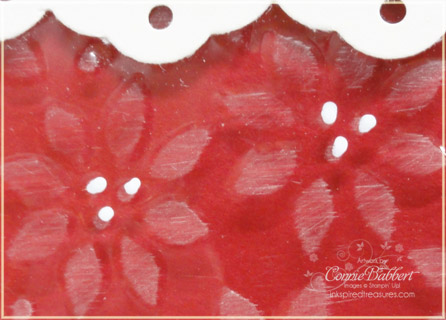
For Christmas cards, I like them to be easier to mail without a lot of bumpiness to them. This one fits the bill! The base card is Real Red. Across the top I used the Jolly Holiday Designer Paper Stripe and added the Eyelet Border Punch across the bottom in Very Vanilla. To hide that seam I used the 5/8 Old Olive Satin Ribbon and wrapped it around the back of the DSP to secure. (BTW – my Ribbon Shares are still going on!) Next I ran a 2" x 5 1/2" of Medium thickness Window Sheet thru the Big Shot with the Petals A Plenty Impressions Folder. Then I took my Sanding Block and sanded off the top of the impressions…it really gives it a frosted look!

In the center of the flowers, I used a White Gel Pen to highlight them. This panel is adhered under the Eyelet Border and at the bottom corners with Mini Glue Dots to hold it on the base Real Red cardstock. I tried to put the glue dot under a flower so it was less noticeable.
To finish the card, I used my Stampin' Write Markers in Old Olive, Real Red and Daffodil Delight to ink up the flower from Stampin' Up!'s Gifts of Christmas Stamp Set on Very Vanilla. I punched it out with the Wide Oval Punch, then layered it on the Lots of Tags Die cut from Real Red cardstock. I love the elegant look of that tag! The piece is popped up with Stampin' Dimensionals!
Note: I haven't forgotten the directions for the Halloween Flip Card I made last week…my Stamp Clubs are doing the card on Thursday night and I'll get them posted soon after that!
.png) The Holiday Edition of Create with Connie and Mary has started, but it is not too late to join! It is an 8 week subscription featuring stamps and products from the new Stampin' Up! Holiday Mini. There is a new project posted every day and an average of two fabulous tutorials a week. NEW this year is a Project Sheet for every post! Our site stays up long after the session is done, so you will have access to the site and the tutorials to refer back to the projects. For more information, please visit at Create with Connie and Mary!
The Holiday Edition of Create with Connie and Mary has started, but it is not too late to join! It is an 8 week subscription featuring stamps and products from the new Stampin' Up! Holiday Mini. There is a new project posted every day and an average of two fabulous tutorials a week. NEW this year is a Project Sheet for every post! Our site stays up long after the session is done, so you will have access to the site and the tutorials to refer back to the projects. For more information, please visit at Create with Connie and Mary!
