
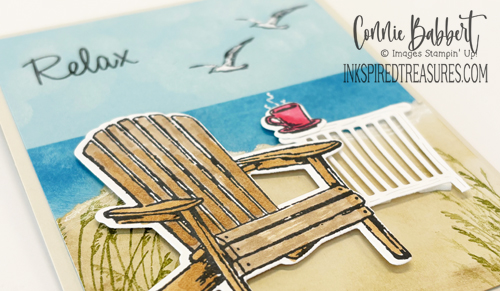
It’s Saturday and time for our Create with Stamping Friends Blog Hop. This week’s theme is “Favorite New 2026 Stamps/Bundles”…ideas from the new May-August Catalog or May Online Exclusives! SPLASH… [Read More]
CSF916 – Relaxing Waterside
It’s Thursday and time for our Create with Stamping Friends challenge! We have a nice color combination for you this week! RELAXING WATERSIDE I love playing with new products and… [Read More]
CS241 – Banner Sayings
Our Creatively Simple theme this month is “Let’s Get Punchy”! BANNER SAYINGS This one is a quick and easy card using mostly DSP for the focus…with a banner greeting! I… [Read More]
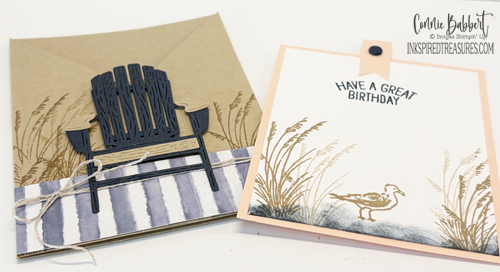
IM432 – Relaxing Waterside
Welcome to our Create with Stamping Friends Inspiration Monday challenges. This week’s inspiration is a wonderful beach scene! RELAXING WATERSIDE I love me some beach time! One of my favorite… [Read More]
Saturday Blog Hop – All About Greetings

It’s Saturday and time for our Create with Stamping Friends Blog Hop. This week’s theme is “All About Greetings”…the greeting should be the focal point of our card! BBQ MASTER… [Read More]
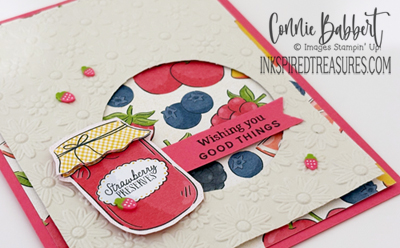
CSF915 – Heirloom Boutique
It’s Thursday and time for our Create with Stamping Friends challenge! We have a fun sketch for you to try this week! HEIRLOOM BOUTIQUE Here’s another new Bundle from Stampin’… [Read More]
CS240 – Cutest Crew

We have a new Creatively Simple theme this month…Let’s Get Punchy! Should be fun! CUTEST CREW I used punched circles from the Hobby Haven DSP for the background of my… [Read More]
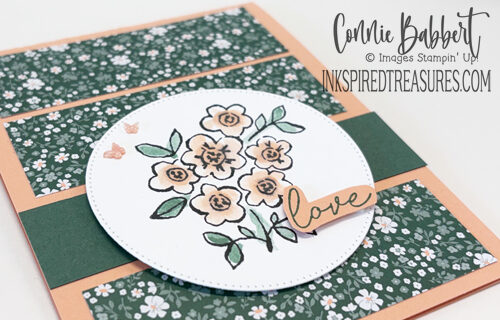
IM431 – Ferns & Flora

Welcome to our Create with Stamping Friends Inspiration Monday challenges. This week’s inspiration is a beautiful sunrise/sunset set in a fern garden! FERNS & FLORA I knew I had to… [Read More]
