 YEAH!!!! We're back! Our Holiday edition was so popular, we decided that it's time to introduce another Create with Connie and Mary Card "Create"tions. This time it is for ALL Occasions! We are SUPER excited! Mary and I will both be doing FREE Preview Card Sets this week so you'll see what Card "Create"tions is all about if you didn't join before! But…it's ALL CARDS featuring 18 different stamp sets in the MAIN and SPRING Mini catalogs…over 72 different card ideas!
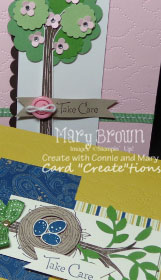
Mary Brown is up first with her FREE Preview Card Set, Take Care! I don't have this set…but it is definitely on my list now that I've seen her card set! We also have BLOG CANDY today…a FREE Subscription to Card "Create"tions…see WHERE over on Create with Connie and Mary! If you win and you've already signed up, we'll give you a subscription to our next edition, so don't worry!
Check out Create with Connie and Mary download her FREE Project Sheet with close up photos and details and to find out more details about how to sign up! Here's a sneak peek of a couple of her cards!

*******************************************
My card is based on Technostamper's Monday Lunchtime Sketch Challenge, TSSC256 today.
.jpg)
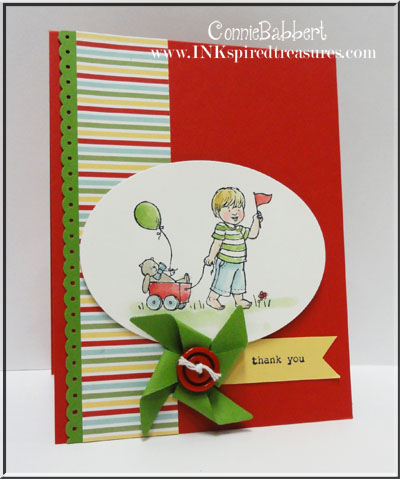
I'll be featuring Little Friends later this week for MY Preview Card Set, but I'm showing off another card using this set today! Here's my card…this is the type of detail you can expect from our Project Sheets…dimensions, directional steps and a few tips!

Here are the details:
- Base is 4 1/4 x 11 of Real Red, folded in half.
- I used the Dotted Scallop Ribbon Border Punch with Gumball Green cardstock and added the punched strip behind the 1 1/4 x 5 1/2 strip of Storytime Designer Paper along the left side.
- I cut a Whisper White oval from the Oval Framelits and stamped the little boy with wagon on it with Black Stazon.
- I used Stampin' Write markers in So Saffron, Real Red, Gumball Green, Blush Blossom, Crumb Cake and Baja Breeze to color in my image with the AquaPainter. It is popped up on the front with Stampin' Dimensionals.
- I thought it would be fun to add the little Pinwheel Die shape, cut from Gumball Green, secured with a Mini Brad, then topped with a Red Button tied with White Bakers Twine. TIP: If you place the brad from the back to the front and then add the little pinwheel "legs", it is much easier to work it to secure! Just cover the legs with the button!
- Finally I stamped Thank You with Black Stazon on a strip of So Saffron and tucked it under the pinwheel!
SO….make sure you stop over to Create with Connie and Mary…find out where to get BLOG CANDY, then download Mary's FREE Project Sheet! AND…find out how to sign up for the next edition of Create with Connie and Mary Card "Create"tions!!! We get started next SUNDAY!
