It's HERE!!!
Our Create with Connie and Mary Spring 2013
PREVIEW WEEK is here!
What does that mean?
- BLOG CANDY – SIX free subscriptions!
- FREE PROJECTS with PHOTO TUTORIALS
- Spring session will begin in ONE WEEK with over 30 projects!
- Early Bird Special Price is just about over!
Today Mary Brown is sharing her fun SPRING project over on Create with Connie and Mary! She also has BLOG CANDY!!! So, make sure you stop over on Create with Connie and Mary and find out what you need to do to be entered! AND…download her FREE TUTORIAL…you won't want to miss this cute project. It will give you a taste of what our tutorials are like in our subscription service.
************************************
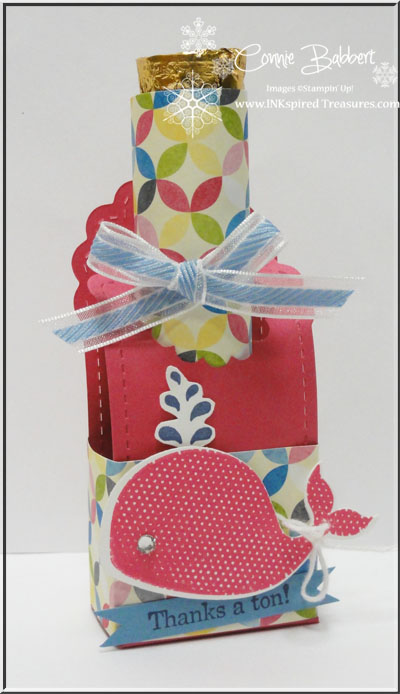
My little favor today was one that I swapped at Leadership in a Candy Swap. It turned out so much cuter than I had even thought in my head! Even my husband really thought it was cute and he rarely says anything! lol! It holds a full size Rolo candy "bar".

Want to know how to make it? Here we go!
- I used the narrow tag from the Two Tags Die and cut two from Melon Mambo cardstock.
- Score 5/8" from the bottom end on both tags to make the base.
- Adhere to a 1 x 1 3/4" rectangle of Melon Mambo cardstock to secure and create the base.
- Punch a 1 1/4" Scallop Circle out of the top of the front tag.
- Cut a 1 1/2 x 6" strip of Sunshine & Sprinkles Designer Paper, score at 1/2, 1 1/2, 3 1/4 & 4 1/4.
- Starting at the back with the 1/2" tab, secure, then wrap it around to the front, using the score lines to create a "box" around both the tags. You will end up in the back again and overlap the 1/2" tab.
- I decorated the front with a 1/4" strip of Marina Mist, stamped in Night of Navy with "Thanks a ton!"
- I stamped the whale with Melon Mambo ink on Whisper White and cut it with the Whale Clearlit Die. I added a rhinestone for the eye and tied a bow of White Baker's Twine on the tail.
- The spout of water was stamped with Night of Navy on Whisper White and handcut out, then adhered with a Mini Glue Dot to the front.
- I cut more Designer Paper 3 x 4 1/4 to wrap around the Rolo candy, adhering it securely.
- I tied the Marina Mist 3/8 Striped Organdy Ribbon around the candy roll and tied a bow.
- On the bottom of the candy roll, I adhered a punched 3/4" circle of cardstock so that I could use Mini Glue Dots to hold the candy end in place on the bottom of the holder. It just secured it better than the gold foil wrapper did.
- Slide the Rolo candy from the front to inside the box, the scallop circle hole helps hold it in place!
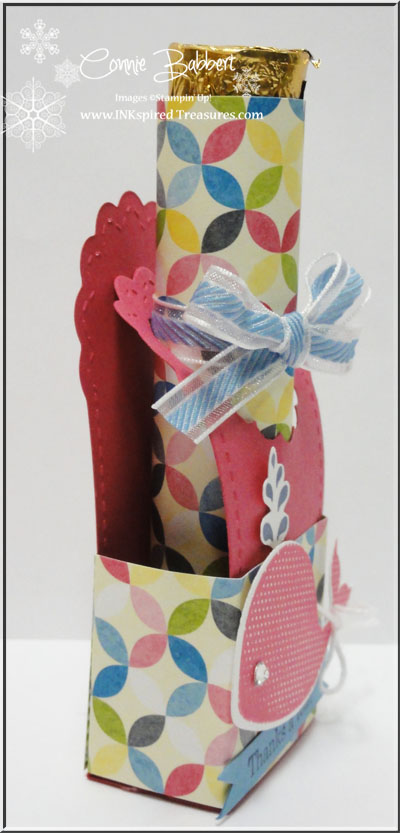
Here's a side view:

So…what do you think? Cute??? What a nice little favor for a party or treat for someone special!
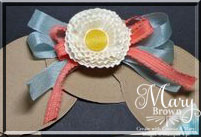
Now…don't forget! Check out Mary's darling project over on Create with Connie and Mary, get the FREE project tutorial AND find out where to get BLOG CANDY today! Here's a SNEAK PEEK!

.png)

Great project! Thanks for sharing.
What a fun project Connie. Love this stamp. TFS
Oh whale, just when I thought this stamp set was one I didn't need – you come up with this cutie! Love the bling in her eye. The whale is pink so it must be a she! Anyway, thanks a ton for sharing the tutorial with us. I have a friend who loves Rolo candy. Sorry, I couldn't help myself with the puns!
This is just the cutest little whale favor! Now I know I need the whale stamp, etc. Now if I can just get the Rolo's in the favor before it gets eaten. HA HA!
I really love this stamp set and can see many useful and wonderful projects in my mind's eye using this set. Thanks for sharing this wonderful and cute project!
I love this…and Rolo's are one of my favorite sweets!!!! Lucky ladies int that swap…. This little whale has been speaking with me so much that it will be on my next order….tooo bad they didn't make it a bundle for us!
I love this! It's so fun and yummy too. Smiles, ebeth