
Country Road
I think most of us struggle with masculine cards, don’t you? Give me a flower set and I will go to town creating…but more masculine sets take a little more thought process! So, I purchased this stamp set, Country Road, specifically with masculine cards in mind! I made this card for one of the New Catalog Swaps that I participated in.

Stampin’ Details:
- The base is 5-1/2 x 8-1/2 Early Espresso cardstock, scored at 4-1/4 and folded.
- On the 4 x 5-1/4 layer of Very Vanilla cardstock, a 1-1/2 x 5-1/4 strip of Merry Merlot cardstock was placed across the center.
- The country star was stamped with Early Espresso on the Merry Merlot cardstock towards the right side.
- The greeting from Country Road was stamped with Early Espresso Ink below the Merry Merlot strip.
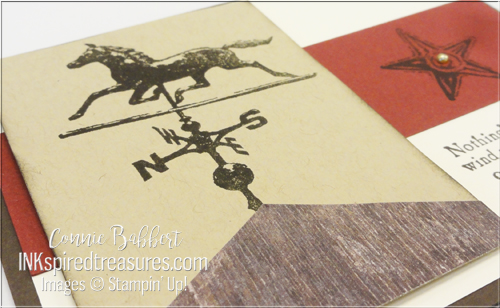
- On the 2-3/4 x 3-3/4 piece of Crumb Cake cardstock, a piece of Wood Textures Designer Paper was angle cut to look like a “roof line” on the bottom.
- The horse weather vane was stamped with Early Espresso Ink above the “roof”
- The edges of the Crumb Cake piece were sponged with Early Espresso Ink and the piece popped up on the front with Stampin’ Dimensionals.
- A Gold Metallic Pearl was added to the center of the country star.
Here’s a closeup of the card:
My second card uses some lighter colors, but still has a masculine vibe to it.
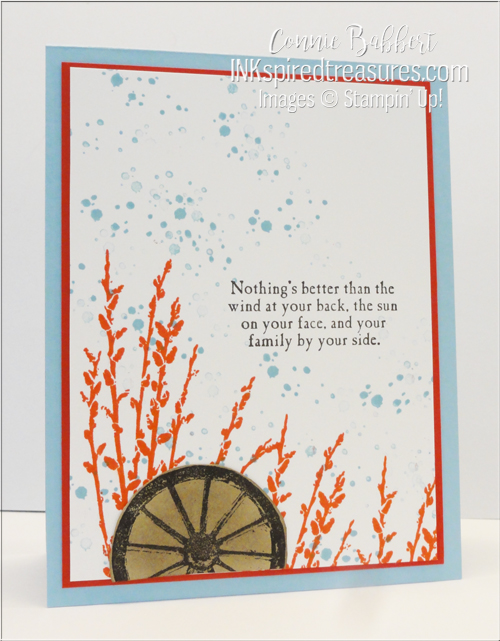
- The base is 4-1/4 x 11 Balmy Blue cardstock, scored at 5-1/2 and folded to form the base card.
- A 3-7/8 x 5-1/8 layer of Poppy Parade cardstock was placed on top.
- On the 3-3/4 x 5 piece of Whisper White cardstock, the branch image was stamped diagonally across the bottom with Poppy Parade Ink.
- The speckle image from Timeless Textures was stamped randomly (diagonally) with Balmy Blue Ink in the background.
- The greeting was stamped with Early Espresso Ink.
- The Wagon Wheel was stamped with Early Espresso Ink on Crumb Cake cardstock. Sponged with Crumb Cake Ink and hand cut and trimmed across the bottom, then added to the front.
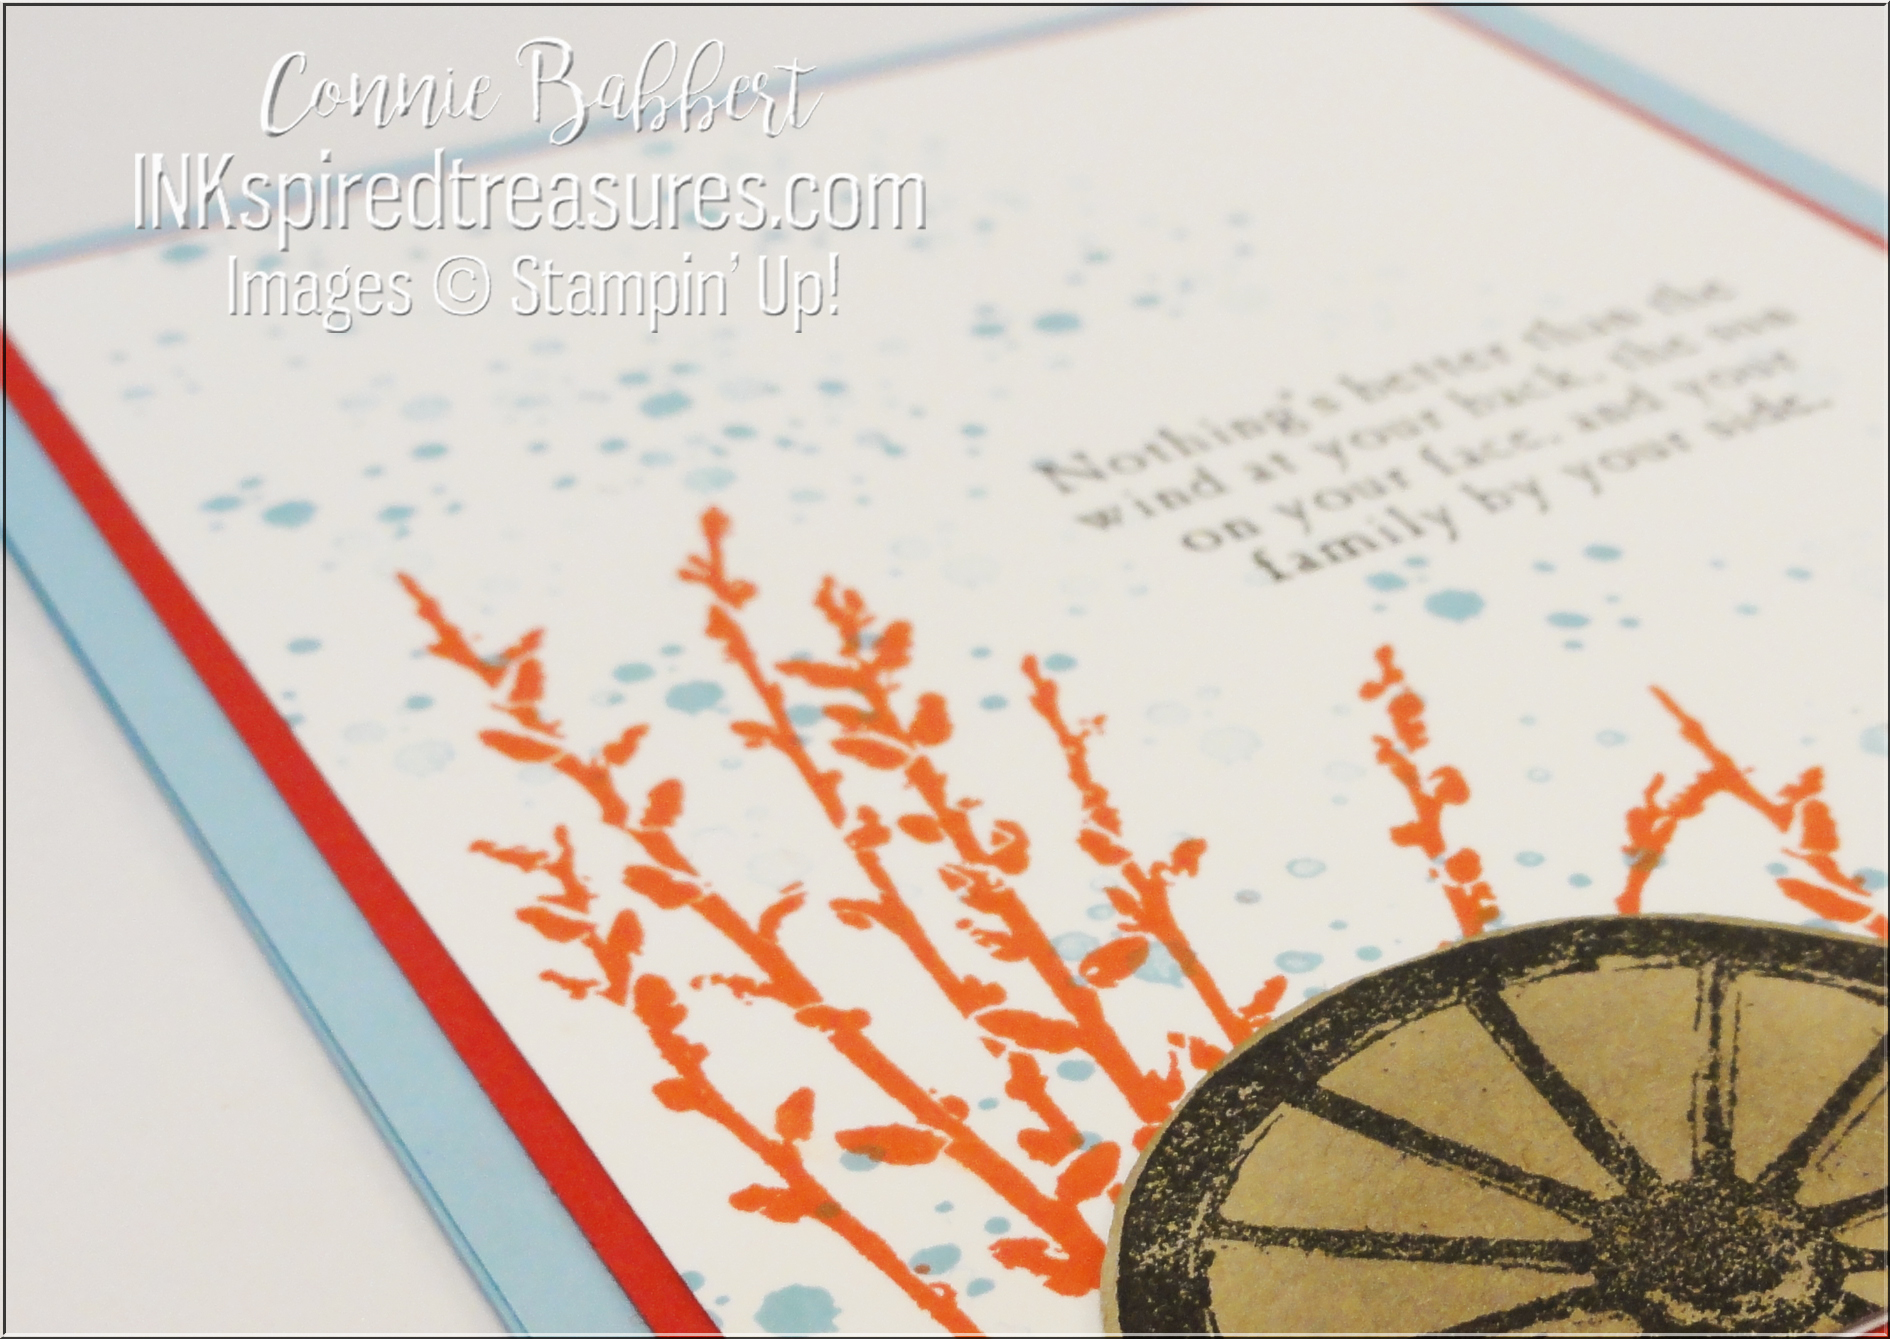
Here’s a closeup…love these colors for a masculine card!
Hope you liked my masculine cards and can use them for inspiration! OK…next up on the Control Freaks Blog Hop is another good friend, Melissa Davies! I love her work, so I know you’ll enjoy her projects, too!


Create wonderful dimensional poinsettias in a variety of sizes with the PRETTY POINSETTIA BUNDLE! The dies cut and emboss at the same time for lots of detail and texture. The coordinating stamp images add fun seasonal greetings, sprigs and other festive touches to your cards and projects. We've combined the PRETTY POINSETTIA BUNDLE and the A STITCHED SEASON 12x12 DESIGNER PAPER for a traditional holiday look you'll love! You'll get step-by-step tutorials for SIX projects...FOUR cards and TWO favors in our PRETTY POINSETTIA COLLECTION! See more details HERE!
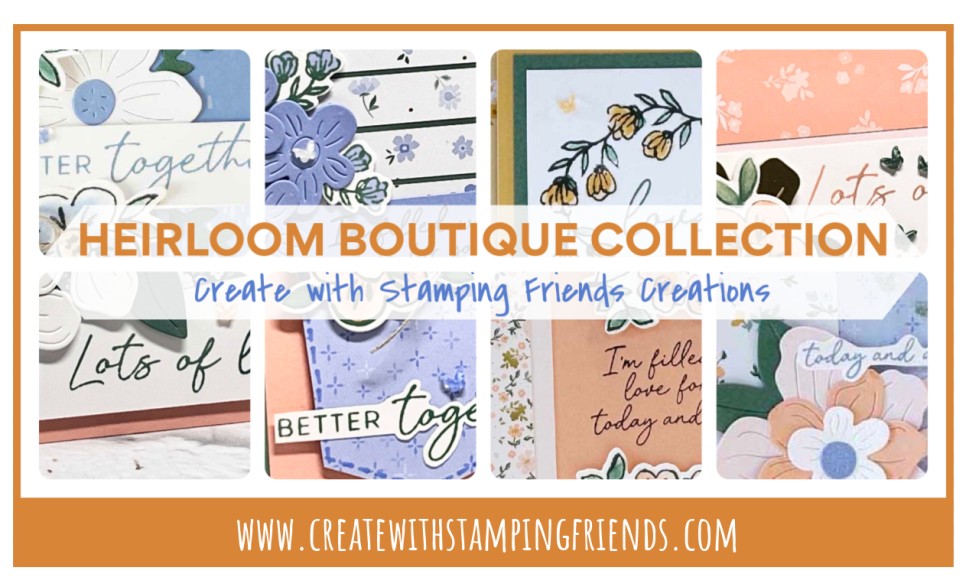
Bring your most meaningful memories to life with the HEIRLOOM BOUTIQUE BUNDLE. You’ll love how the coordinating stamps and dies add delicate florals, layered details, and heartfelt sentiments to your cards, scrapbook pages, and handmade gifts. These timeless designs will help you turn every project into a keepsake to share and cherish. We've combined the HEIRLOOM BOUTIQUE BUNDLE and the BLOOMS BOUTIQUE 12x12 DESIGNER PAPER for a soft artistic look! You'll get EIGHT step-by-step tutorials for EIGHT cards in our HEIRLOOM BOUTIQUE COLLECTION! See more details HERE!
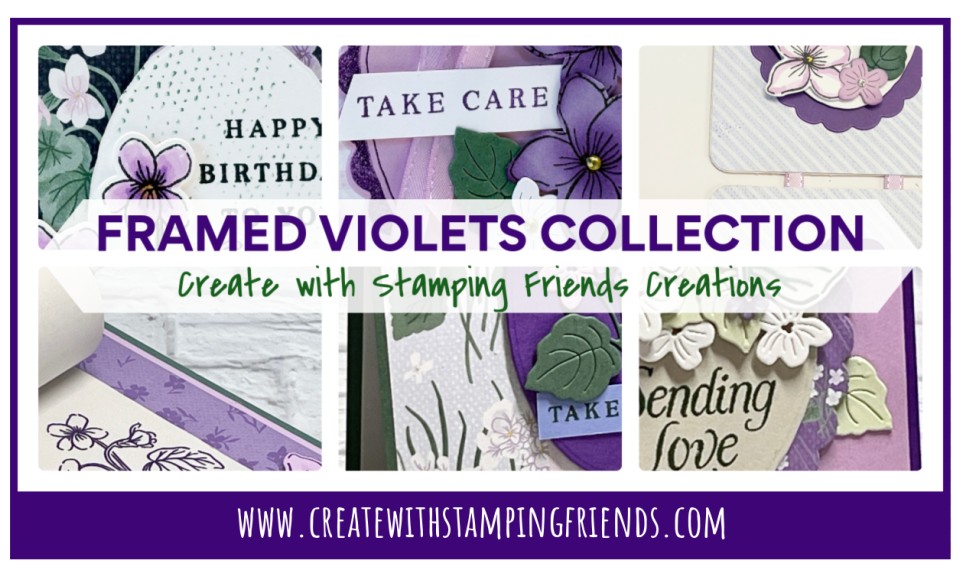
Stamp a bunch of violets quickly with the line-drawn images in Stampin' Up!'s FRAMED VIOLETS BUNDLE (available for customers beginning July 1st). Layer them together easily and add a die-cut oval, some accent florals and leaves for extra texture and subtle details. Everyday greetings give a finished level of polish. We've combined the FRAMED VIOLETS BUNDLE and the VIOLET DREAMS 12x12 DESIGNER PAPER for an eye-catching cohesive look! You'll get SIX step-by-step tutorials for FOUR regular cards and TWO small 3D projects in our FRAMED VIOLETS COLLECTION! See more details HERE!

Connie, these are wonderful! Love the Wood Textures roof line, especially. Very clever!