.jpg)
It's time for the December Tour de Freaks, brought to you by your Control Freak Swappers! You've probably just arrived from the fabulous blog of Liz Shultz! We have 11 stops this month filled with ideas from the new Occasions Mini and Sale-A-Bration catalogs!
In the case of my first project, you could still easily make these for last minute Christmas gifts! Can you tell what the plastic sleeve is made from? If you guessed a 6×6 page protector…you are right! I made some similar to this one for roommate gifts at Convention MANY years ago. My upline reminded me and we did one for a project at our Holiday Stamping Festival a couple months ago. I updated it again using the new Fun Flowers Bigz Die, Baby Blossom Stamp Set and Springtime Vintage Designer Paper!
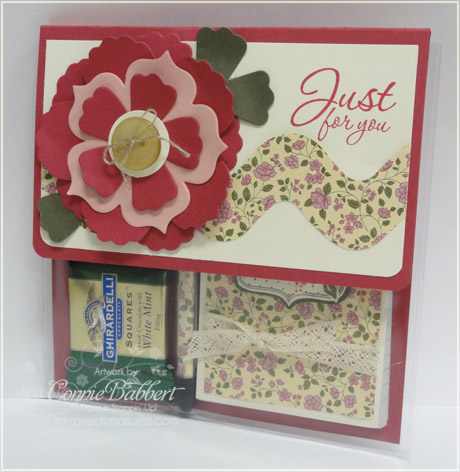
The Rose Red cardstock back slides down into the 6×6 page protector (cut off the excess tab on the side first) and is held in place with a couple mini glue dots in the top corners on the back. The cardstock measures 6 x 10" and scored at 6 1/8 & 6 3/8 on the long side. I rounded the bottom front corners of the flap with the Small Corner Rounder. I added a layer of Very Vanilla cardstock on the front flap. Then I used the Tasteful Trim die to cut a piece of the Springtime Vintage Designer Paper in the curvy wave pattern. On top I layered two of the large Rose Red flowers, then one Blushing Bride medium flower and the small Rose Red flower from the Fun Flowers Bigz Die. The leaves are cut from the smaller flower of Always Artichoke cardstock. I punched a 1" Circle and then added a Small Crumb Cake Big Designer Button with a bow of Linen Thread in the center. The greeting from Afterthoughts Hostess Set is stamped in Rose Red.
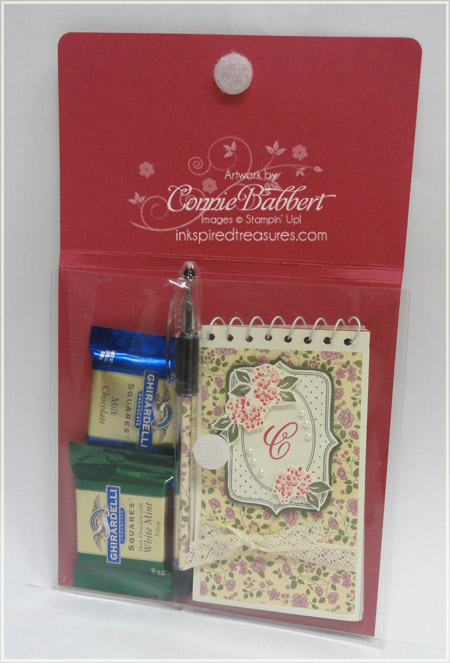
Inside there is enough room to hold a small spiral notebook that I covered with Very Vanilla cardstock and more Springtime Vintage Designer Paper. On the notebook, I added some Crochet Trim before I adhered the DSP. I stamped the label from Baby Blossoms in Very Vanilla with Always Artichoke Classic Ink and cut it out. Then I layered it on Always Artichoke cardstock and trimmed around the outline to make a matted layer. I stamped the small flowers from Baby Blossoms on scrap Very Vanilla with Rose Red and Always Artichoke, cut them out and placed them in the upper left and lower right corners with Stampin' Dimensionals. The initial C is from Monogram Sweet Alphabet Set, stamped in Rose Red in the center of the oval. I added tiny adhesive pearls in the remaining space of the oval around the initial.
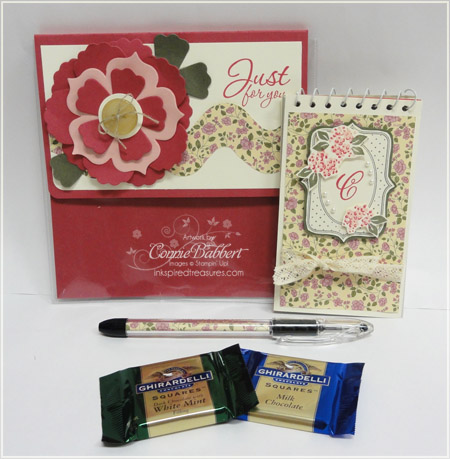
I also decorated a RSVP pen by cutting a 3/4 x 3 1/4 piece of the same pattern Springtime Vintage Designer Paper and wrapping it inside the tube of the pen. I added two Ghirardelli Chocolate Squares in the extra room of the package…because face it…who DOESN'T love a little chocolate? (Sorry, I only had one White Mint green one left…I would color coordinate better if it were going to be a gift! lol! I wasn't going to fight the stores today to pick up more of the White Mint ones.)
If you didn't want to put in the elements that I do, it will also hold four regular sized cards easily!
I used the same Springtime Vintage Designer Paper for my next card. A simple layout, but looks great, even though it didn't take a lot of time to make! I used the new Baby Blossoms two step stamp for this card, too!
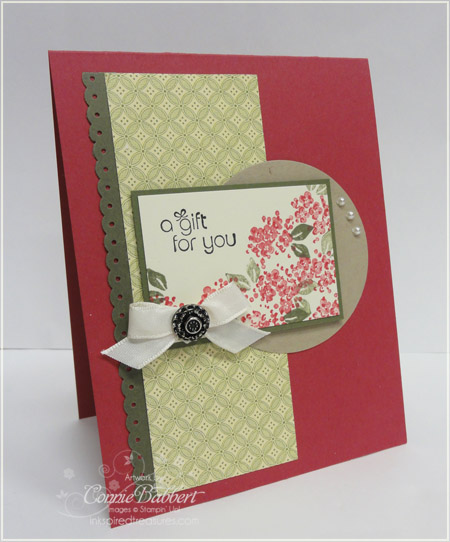
I started with a base of Rose Red cardstock. I used the reverse side of the print I used above and added an edge of the Always Artichoke Dotted Ribbon Punch along the left side. I stamped off the background flower of Rose Red on Very Vanilla, then the top two-step in full strength Rose Red to get the two-tone look to the flowers. I did the same with the Always Artichoke leaves. The words A Gift For You are from the new stamp set, Bring on the Cake, and stamped in Basic Black. I added a Very Vanilla Taffeta Bow with Vintage Brad to the corner. The Very Vanilla was layered on Always Artichoke and popped up with Stampin' Dimensionals. I used the 2 1/2 circle punched from Crumb Cake in the background with a few adhesive Pearls.
Next stop is the fantastic Jan Tinklenberg…I'm sure she has some amazing projects! Make sure to go all around the 11 stops of the tour until you get back here…you won't be disappointed!
.jpg)

Connie, I always love seeing your work. You do an excellent job. Merry Christmas!
Wow Connie! The notebook/candy/pen projects is such a great idea – lots of great possibilities with that! Love the card too!
You always come up with the greatest projects, Connie!! That Baby Blossoms set is definitely next on my list! LOVE everything you've done with it!! (and thanks for the great idea with the 6×6 bags, too!)!! 🙂
What a great way to use the 6 x 6 page protectors. I have a bunch of them sitting here and now I'll have another use for them. Thanks!
Connie, love your treat pouch, I need to make something like that for upcoming events! Your card is adorable too, bought the paper and stamps, yeah. You've inspired me to get moving.
I know the Baby Blossoms set and Springtime papers will surely be in my next order – thanks so much for sharing your wonderful projects
What a great idea putting it all together in a 6 x 6 page I might have to have a play.
Connie…… your so talented. I vist your site often and am always inspired. This is an adorable project and I can't wait to make a few of my own!
What a great idea putting it all together in a 6 x 6 page I might have to have a play.
This is pretty! Love the layout and the soft feel to this.
I love your little monogrammed tag. Lots of cute ideas for Valentine's Day!