• Create with Connie and Mary
  • Clearance Rack Deals!
  • Tutorials for Sale
  • Skip to primary navigation
  • Skip to main content
  • Skip to primary sidebar

Inkspired Treasures

Connie Babbert, Stampin Up! Demonstrator

  • Home
  • Events
  • Shop My Online Store
  • Latest Catalogs
  • Join My Team
    • Sign Up!
  • Retired SU Products for Sale
  • Show Search
Hide Search

Jar of Haunts Grinch

September 11, 2016 By Connie | 8 Comments

First…remembering…everything 15 years ago.


911
 

I promised I’d show the Grinch I made from the pumpkin in the Jar of Haunts stamp set!  I knew when I originally made and posted THIS HALLOWEEN CARD, that the face looked like the Grinch.  Several others commented the same thing!  Here’s my take on him:


jar-of-haunts-grinch
 

Details are here:

  • The base is 5-1/2 x 8-1/2 Real Red cardstock, folded in half.
  • On the 4 x 5-1/4 layer of Crumb Cake cardstock, a 1-1/2 x 5-1/4 strip of Old Olive was embossed with the Cable Knit folder and adhered on top.
  • Tie a knot in the Watermelon Wonder Mini Striped Ribbon (LOVE that it looks so great for Christmas!) and adhere the ends to the back of the Crumb Cake cardstock.
  • Naughty or Nice from Greetings from Santa was stamped with Memento Black Ink in the upper left corner.
  • A Layering Thinlets circle was cut from the Warmth & Cheer Designer Paper Stack and then layered on a Layering Scallop Circle of Real Red cardstock, then placed on the front with Stampin’ Dimensionals.
  • For the Grinch:  The pumpkin image from Jar of Haunts was stamped with Memento Black Ink on Old Olive, the cut out and the extra band on the side of the pumpkin cut off to make it smaller.  The eyes were stamped on the pumpkin with Memento Black, then stamped again on Whisper White and cut out, colored with Crushed Curry Marker and added over the eyes on the pumpkin.  Add a tiny Basic Black cardstock triangle for the nose and hand-draw the mouth with a Basic Black marker.  The hat was punched from Real Red and Whisper White with the Jolly Hat Builder Punch and the body suit was punched from Real Red with the Bell Punch.  The trim along the neck is a shorter version of the hat band.  The Grinch was added to the circles with Stampin’ Dimensionals!


OK…what do you think?  I think it turned out REALLY great!!!  Fun for my grandkids cards this year!


Sept 2016 collage
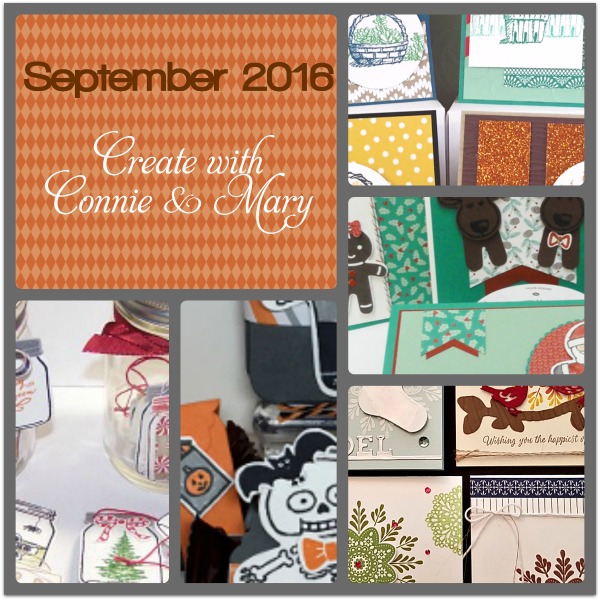
Want some more GREAT ideas?  Create with Connie and Mary opened our September Mini Session today!!!  If you’ve never tied us, jump in and join us!  You’ll love the three sets of 4 card ideas and two 3D projects we came up with this month…all with step-by-step photo tutorials for only $8.95 US!  We’re using products from the HOLIDAY CATALOG and ALL projects are EXCLUSIVE to subscribers…you won’t see these ideas posted anywhere else online!  Visit us at Create with Connie and Mary to sign up!


Save

Save

Save

Save

Save

Save

Save

Save

Filed Under: Cards Tagged With: Grinch, Jar of Haunts, Pumpkin, punch art, Stampin' Up!

I love stamping cards, altering 3D items and making little favors. I've been stamping for over 19 years and had my 18th year Stampin' Up! anniversary in early May. I love being part of something that sparks my creativity and hear people comment, "you MADE this?" I also enjoy sharing that passion with others in my classes! If you live anywhere in the Delaware, Dublin, Powell, Lewis Center, Hilliard or surrounding Columbus, Ohio areas, join us! I love to meet new stamping friends. Email me for a current class schedule... I'm adding new classes all the time!

Reader Interactions

Comments

  1. bernath says

    September 11, 2016 at 2:36 pm

    SUPER TOP

  2. Mz Cooie says

    September 11, 2016 at 3:56 pm

    I just love this card…. Your ideas only get better…and how is that possible…..

  3. Sue Duffy says

    September 11, 2016 at 5:42 pm

    Perfect! Does this mean I’m going to have to order the Santa hat punch??!! I wasn’t planning to, but now…. TFS, I think. 😉

  4. Lynne Cullen says

    September 11, 2016 at 6:28 pm

    How creative! Love your Grinch!
    It’s always great to find another use for a stamp set or a punch.
    Here, in Australia, we don’t really ‘do’ Halloween, so I have never considered this stamp set, but it’s definitely on my wish list now!

  5. Betty says

    September 11, 2016 at 8:16 pm

    How absolutely creative! Love, Love, LOVE it!

  6. Laura Holm says

    September 11, 2016 at 8:57 pm

    OMGosh! I LOVE what you have done! I thought it was a real GRINCH STAMP!!! You fooled me!! YOur grandkids are going to love these!!! Thanks for sharing!

  7. Lucy says

    September 12, 2016 at 5:59 am

    This is a great card! So cute and fun!!

  8. Sheila Weber says

    September 20, 2016 at 8:06 am

    Too cute!

Leave a Reply Cancel reply

Your email address will not be published. Required fields are marked *

Primary Sidebar

Use HOST CODE:  DFQD4KKC 


Could the Snail Mail Suite of products be ANY cuter?  Look at those little faces and those Resin Hearts…oh my!  We are using the Snailed It Stamp Set and Snail Dies for our next Collection of tutorials!  For this Snailed It Collection, we’ve made three cards (one a fun fold), and an absolutely FUN and unique favor box that is perfect for your stamp camps and classes!   You’ll want to make several to give away!  See more details here!


For our Friends are Like Seashells Collection, we’ve made FOUR cards (one a fun fold), a small favor and a 3D project that are perfect for your stamp camps and classes!   This bundle has a coordinating 3D Embossing Folder that can be used with the large die for a stamp, emboss and cut combo that has so much texture, they almost look real!  See more details HERE!

Next up for us to feature is the LOTS OF HEART Stamp Set and MANY HEARTS Dies!  Even with all the hearts, this bundle is more than just a Valentine set!  For this Lots of Heart Collection, we’ve made FOUR cards and TWO small favors, perfect to give someone you love or as a little thank you!  We’ve paired this bundle with the cute and colorful Snail Mail Designer Paper and accessories.  See more details HERE!


Connie Babbert
Stampin’ Up! Demonstrator
Lewis Center, OH
614-371-8484


Subscribe to Blog via Email

Enter your email address to subscribe to this blog and receive notifications of new posts by email.

Archives

Categories

Disclaimer

As an independent Stampin’ Up! demonstrator, all of the content on this blog is my sole responsibility and the use of and content of the classes, services, or products offered is not endorsed by Stampin’ Up!

The contents of my blog are my own and ©Connie Babbert and as such may not be copied, sold, changed or used as your own for ANY magazines, contests, Stampin’ Up! events, swaps, profits or otherwise without my permission and is here solely for the purpose of inspiration, viewing pleasure and enjoyment. Thank you for understanding.

Content © Connie Babbert, All Rights Reserved. Genesis framework customized by WebsByAmy.com