
It’s a new month and for the month of June we are featuring “masks”. There are a multitude of different ways to mask on cards. I’ll be showing a few different techniques over the next few weeks!

YOU ARE REMARKABLE
First up I chose to do defined edge masking. Super simple. Take two long pieces of cardstock and tape them down leaving an opening on your card front approximately 1-1/4″ wide (or any width you decide).

- The base is 4-1/4 x 11 Granny Apple Green cardstock, scored at 5-1/2 and folded.
- Add a 4 x 5-1/4 layer of Basic Black cardstock on top of the base card.
- On the 3-3/4 x 5 layer of Basic White cardstock, temporarily adhere to long pieces of paper to mask and leave a 1-1/4″ gap. Use Daffodil Delight Ink and Granny Apple Green Ink with Blending Brushes to add spots of color in the open area. Remove the side masks. This will give you nice crisp edges along the masked color!
- Stamp the leaves and flower with Memento Black Ink over the colored ink.
- Stamp the greeting with Memento Black Ink in the lower left corner.
- Add a trio of white/gold Strawberry Slush & Pretty in Pink Gems to the background.

SUPER simple to do this mask technique! I love these colors, too! OK, check out Debbie’s new Creatively Simple card over on Create with Stamping Friends!

Supplies:
Stamps: You are Remarkable
Inks: Daffodil Delight, Granny Apple Green, Memento Black
Cardstock: Basic White, Granny Apple Green, Basic Black
Accessories: Strawberry Slush & Pretty in Pink Gems, Blending Brushes, Adhesives


Create the feel of a nature walk through the winter woods with Stampin' Up! FROSTED PINECONES BUNDLE! Stamp the pinecone and then add textured details using the FROSTED PINECONES DECORATIVE MASKS or cut the detailed shapes with the FROSTED PINECONES DIES. Add one of the heartfelt winter sentiments to finish it off. We've paired the FROSTED PINECONES BUNDLE with the WHISPERING WOODS 12x12 DESIGNER PAPER. Our FROSTED PINECONES COLLECTION gives you step-by-step tutorials for FOUR cards and TWO small decor ideas for a total of SIX tutorials, all full of seasonal charm. See more details HERE!

Boo! October brings Halloween and the playful images in Stampin' Up!'s WEB OF FUN BUNDLE will create a little spooky fun on your cards, paper crafts, and scrapbook pages! The large greetings and detailed spiders and webs will fill your project space with eerie delights! We've paired the WEB OF FUN BUNDLE with the FRIGHTENING FUN 12x12 DESIGNER PAPER containing even more Halloween patterns and designs! Our WEB OF FUN COLLECTION gives you step-by-step tutorials for FOUR cards and TWO favor ideas for a total of SIX tutorials, all full of festive Halloween charm. See more details HERE!
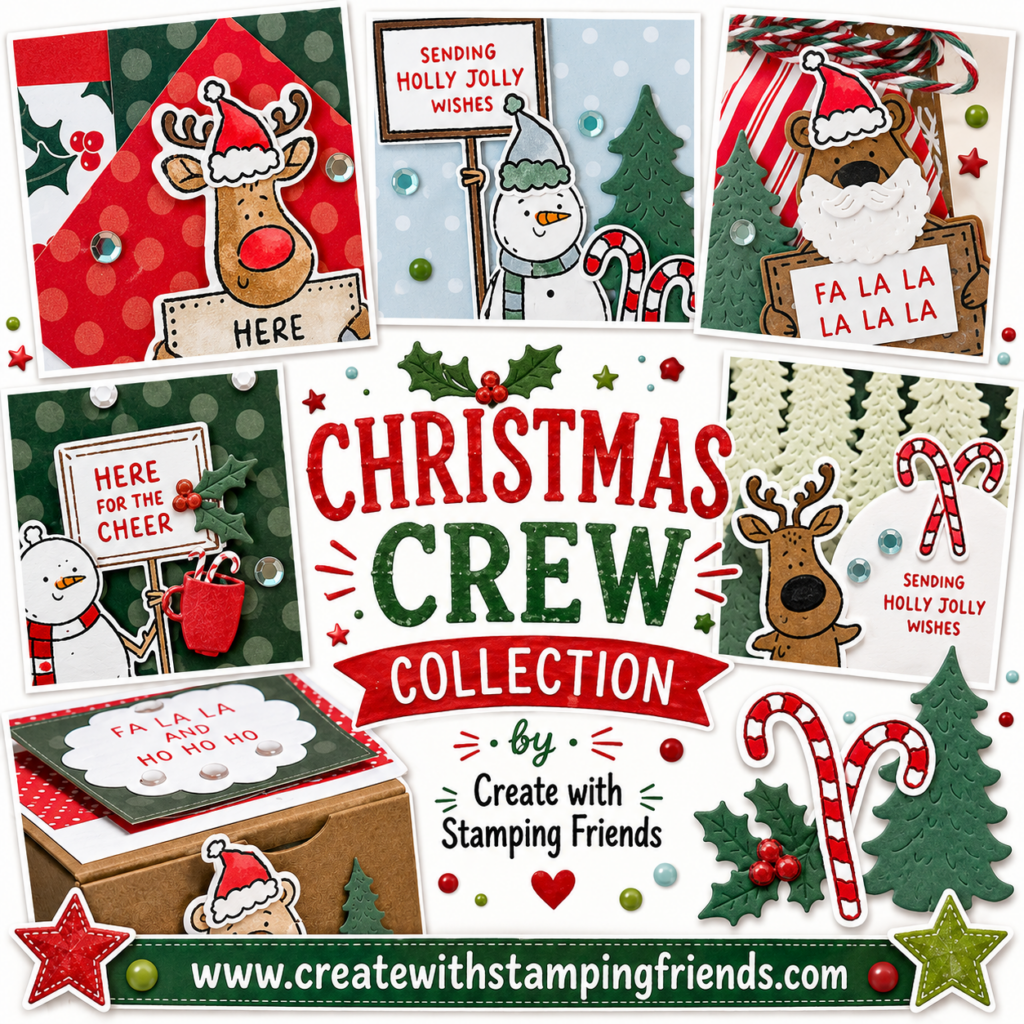
The playful critters in Stampin' Up!'s CHRISTMAS CREW BUNDLE will certainly brighten your day! Stamp and cut out the whimsical bear, snowman or reindeer, stamp a holiday greeting on their sign, then add finishing touches with the candy canes, Santa beard, evergreen trees and more! This CHRISTMAS CREW BUNDLE will give you fun tools to create festive holiday cards and tags. We've combined the CHRISTMAS CREW BUNDLE with the classic colors and patterns in the TIMELESS CHRISTMAS 12 X 12 DESIGNER PAPER! You'll get step-by-step tutorials for FOUR cards and TWO Advent Treat Box ideas for a total of 6 tutorials, all full of handmade charm. See more details HERE!


