Happy Friday! I know! An extra post for you this week from me! Currently, Debbie and I have the Sweetest Star Collection of projects for sale…you can buy the Kits or a PDF tutorial. For something different in this Collection, we made ornaments using the Sweetest Star Bundle! I had so much fun, that I made a second type of ornament for my own tree using Mrs. Claus. It turned out so cute that I thought I’d share it here.
Here’s more information about our latest collection…

The star-shaped Santa, Mrs. Claus, and gingerbread man images from Stampin’ Up!’s SWEETEST STAR PUNCH BUNDLE are adorable to use on your holiday cards, tags and paper projects. They are a wonderful take on some classic Christmas icons. Show your creativity with your favorite coloring technique, punch out the plump star, and add a holly jolly sentiment! We’ve paired the SWEETEST STAR BUNDLE with the TAKE A BOW 6×6 DESIGNER PAPER for a fun holiday look. Our SWEETEST STAR COLLECTION includes step-by-step tutorials for SIX projects…FOUR cards and TWO paper ornaments…perfect for teaching a class, giving as a gift, or for selling at craft shows! See more details HERE!
SWEETEST STAR
Stampin’ Details:
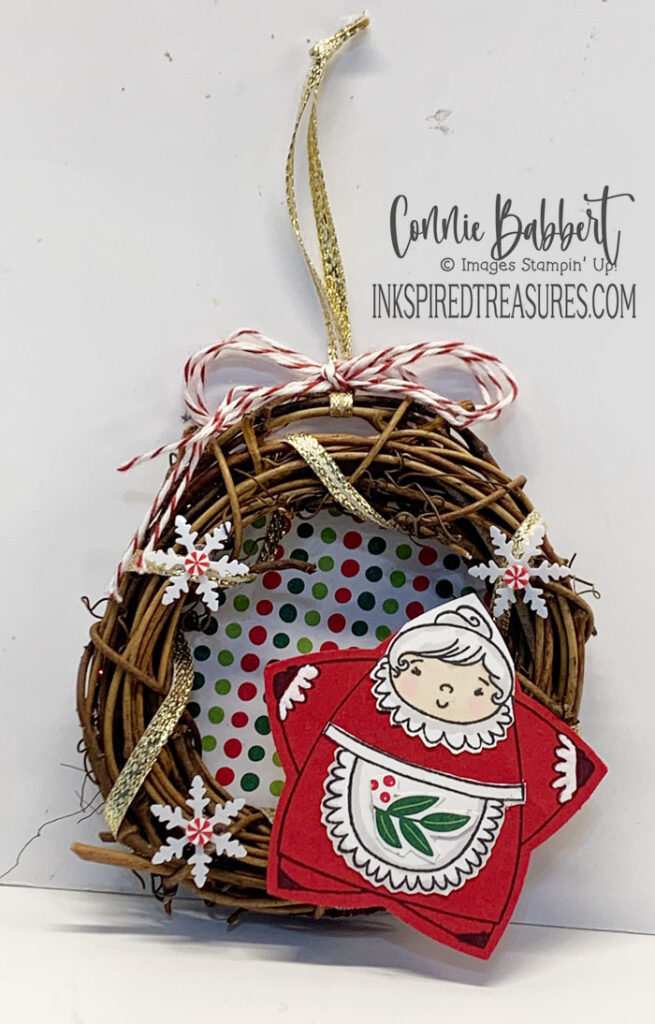
- The base is a 3″ mini grapevine wreath I ordered from Amazon. You can find them HERE!
- I wrapped the 1/8″ Gold Trim from the Gold/Silver Combo Pack around the grapevine starting at the top and ending there, securing with a Mini Glue Dot.
- A added a loop of Gold Trim at the top for the hanger and tied a knot.
- The Red & White Baker’s Twine was tripled and then tied in a bow around the base of the trim loop to hold it secure.
- I cut a 3-1/8″ Deckle Circle from Thick Basic White cardstock and another from the Take a Bow 6×6 Designer Paper and adhered them together, then glued to the back of the grapevine ornament.
- Mrs. Claus from Sweetest Star stamp set was stamped with Memento Black Ink on Real Red cardstock and on Basic White cardstock and punched both with the Sweetest Star Punch. The head and apron were cut away from the Basic White and adhered to the Real Red one. I used Ivory, Light Flirty Flamingo, and Light Gray Granite Stampin’ Blends to color her face, hair and shadows on the apron.
- One of the holly leaves was cut from the Take A Bow DSP and added to her apron.
- White Pearlized Effects was applied to her cuffs.
- Mrs. Claus was added to the side of the grapevine wreath with Stampin’ Dimensionals (or use a glue gun for extra security).
- A trio of white Adhesive Backed Snowflake Assortment snowflakes were added to the wreath.
- Some Red & White Peppermints were added to the centers of the snowflakes.
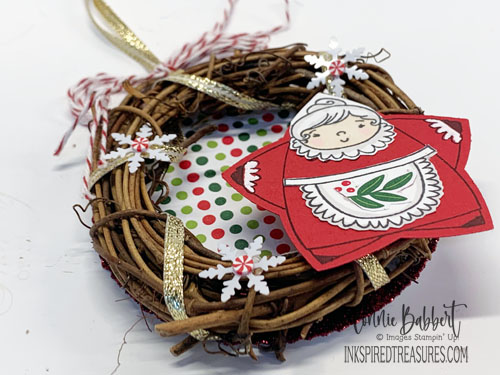
Isn’t she so CUTE? I can’t wait to add her to my Christmas tree!
Supplies:
Stamps: Sweetest Star
Ink: Memento Black
Blends: Ivory, Light Flirty Flamingo, Light Gray Granite
Cardstock: Basic White, Real Red, Take a Bow 6×6 Designer Paper
Accessories: Sweetest Star Punch, Deckled Circle (or other 3″ size circle), Adhesive Backed Snowflake Assortment (Online Exclusive), Gold/Silver 1/8″ Trim Combo Pack, Red & White Adhesive Backed Peppermints, Real Red & White Baker’s Twine, Adhesives

Ghosts and bats and cats, oh my! The OH MY FRIGHT COLLECTION will kick off your Halloween season with sweet and spooky images! Create layers of scary fun with a twisted tree and add cats, bats, a spiderweb, a witch's hat and other accessories to decorate your cards, tags, scrapbook pages and other crafty projects! Finish with a playful Halloween greeting! We've combined the OH MY FRIGHT BUNDLE and the magical patterns in the FRIGHTFULLY FUN 12x12 DESIGNER PAPER! You'll get step-by-step tutorials for FOUR cards and TWO decorated White Gable Box ideas in our OH MY FRIGHT COLLECTION! See more details HERE!

The SIMPLY LEAVES PUNCH BUNDLE can be used for ANY season! Follow our card journey through Spring, Summer, Fall and Winter using this versatile stamp set and punch! The patterned leaves will add natural detail and texture on your cards and projects, then add one of the simple greetings to finish. We've combined the SIMPLY LEAVES PUNCH BUNDLE and the garden neutral patterns in the VALLEY OF BLOOM 12x12 DESIGNER PAPER! You'll get step-by-step tutorials for EIGHT cards...two card ideas from each season...in our SIMPLY LEAVES CARD COLLECTION! See more details HERE!

Create wonderful dimensional poinsettias in a variety of sizes with the PRETTY POINSETTIA BUNDLE! The dies cut and emboss at the same time for lots of detail and texture. The coordinating stamp images add fun seasonal greetings, sprigs and other festive touches to your cards and projects. We've combined the PRETTY POINSETTIA BUNDLE and the A STITCHED SEASON 12x12 DESIGNER PAPER for a traditional holiday look you'll love! You'll get step-by-step tutorials for SIX projects...FOUR cards and TWO favors in our PRETTY POINSETTIA COLLECTION! See more details HERE!

Leave a Reply