
Most of you know that the reason I started selling Stampin’ Up! was because of the cool 3D items that I could make using stamps and products. AND…because the color coordination of Stampin’ Up! products appeals to my “control” tendencies. They make it SO easy! Well…Easter is one of those times that I LOVE to make little 3D favors for my Easter table. So, this week on the Create with Connie and Mary Saturday Blog Hop we are featuring Easter favors! Hope you get some FUN ideas! And, since I love the little bunny in Garden Girl, I had to feature her again on my Silver Mini Gable Box!

Stampin’ Details:
- The base one of the Silver Mini Gable Boxes. They are just the perfect size for putting in some Easter grass and candy!
- The sides are decorated with a 1-3/4 x 12 piece of the polka dot pattern in Bubbles & Fizz Designer Paper (one of the FREE Sale-A-Bration Level 1 selections!).
- The flower row image in Garden Girl was stamped twice with Memento Black Ink on a 1-3/4 x 3-1/2″ piece of Whisper White cardstock, then colored with Stampin’ Blends. It was adhered to a 2 x 3-3/4 piece of Old Olive cardstock.
- The bunny was stamped with Memento Black Ink on a scrap piece of Whisper White cardstock, then colored with the Smoky Slate and Pink Pirouette Stampin’ Blends. The puffy tail is colored with the Clear Wink of Stella.
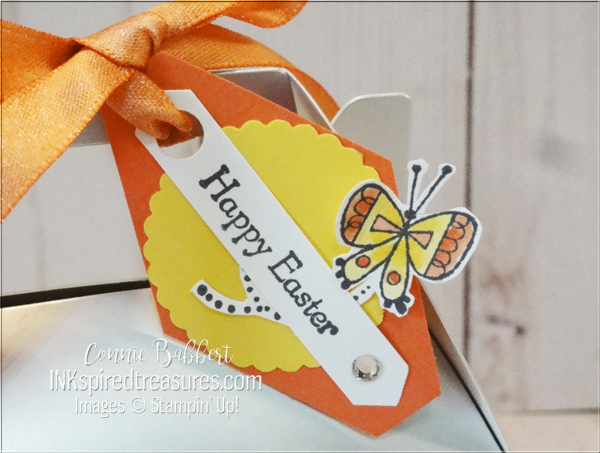
- The tag was made by punching the Tailored Tag from Calypso Coral cardstock and adding a Daffodil Delight 1-3/8″ Scallop Circle punch. Over that is a Classic Label stamped with Happy Easter from Teeny Tiny Wishes and punched from Whisper White cardstock.
- The butterfly from Garden Girl is stamped with Memento Black Ink and colored with Stampin’ Blends, then handcut and adhered to the tag with a Mini Stampin’ Dimensional.
- A 1/4″ circle was punched in the tag and a Rhinestone added for some bling.
- The top is tied closed with some Calypso Coral Shimmer Ribbon (another free Sale-a-bration selections) and the tag tied on.
LOVE it! I think my grand-daughter will get this one in her Easter basket this year! Now to figure out what to do with the boys! lol!
OK…make sure to check out the rest of the Design Team’s creations by continuing on with the blog hop…they will have some wonderful ideas! Next up is our Create with Connie & Mary website and then Mary Brown and her creative design!



Create the feel of a nature walk through the winter woods with Stampin' Up! FROSTED PINECONES BUNDLE! Stamp the pinecone and then add textured details using the FROSTED PINECONES DECORATIVE MASKS or cut the detailed shapes with the FROSTED PINECONES DIES. Add one of the heartfelt winter sentiments to finish it off. We've paired the FROSTED PINECONES BUNDLE with the WHISPERING WOODS 12x12 DESIGNER PAPER. Our FROSTED PINECONES COLLECTION gives you step-by-step tutorials for FOUR cards and TWO small decor ideas for a total of SIX tutorials, all full of seasonal charm. See more details HERE!

Boo! October brings Halloween and the playful images in Stampin' Up!'s WEB OF FUN BUNDLE will create a little spooky fun on your cards, paper crafts, and scrapbook pages! The large greetings and detailed spiders and webs will fill your project space with eerie delights! We've paired the WEB OF FUN BUNDLE with the FRIGHTENING FUN 12x12 DESIGNER PAPER containing even more Halloween patterns and designs! Our WEB OF FUN COLLECTION gives you step-by-step tutorials for FOUR cards and TWO favor ideas for a total of SIX tutorials, all full of festive Halloween charm. See more details HERE!
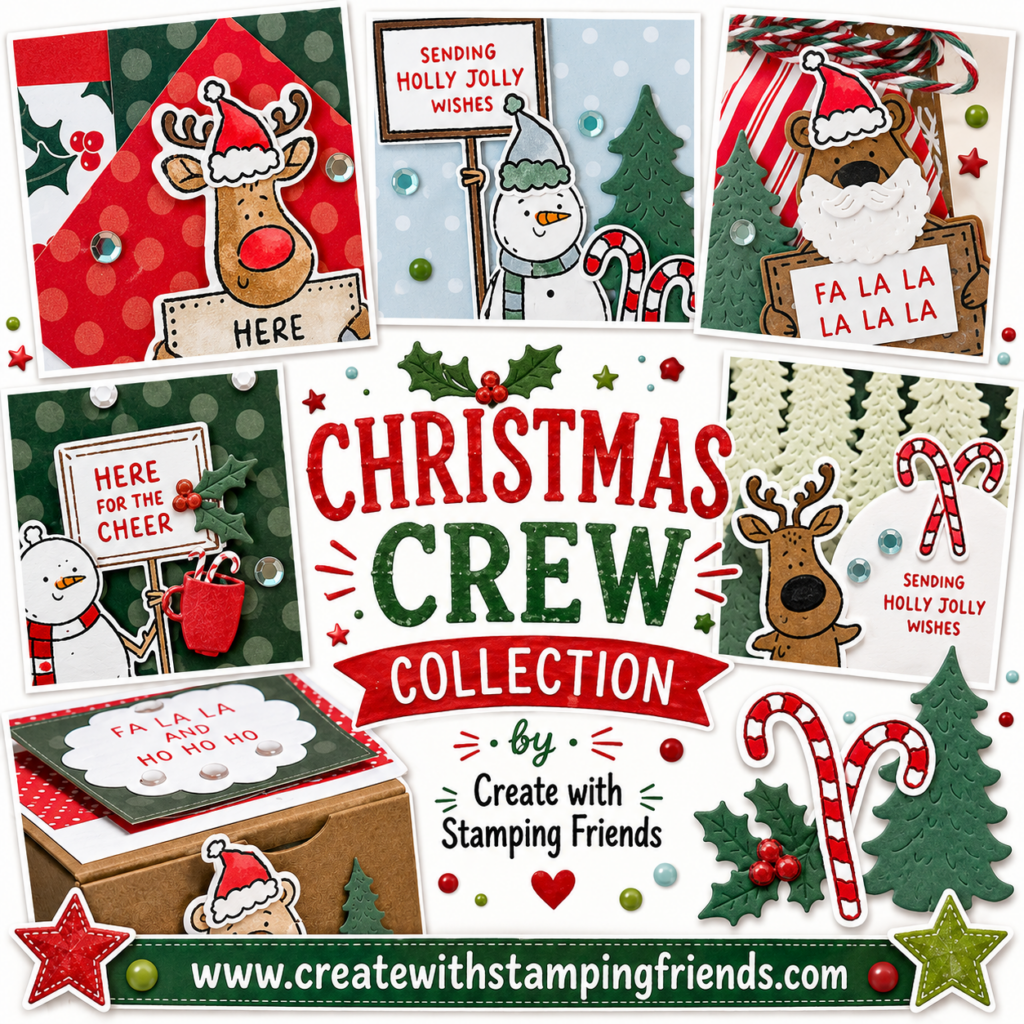
The playful critters in Stampin' Up!'s CHRISTMAS CREW BUNDLE will certainly brighten your day! Stamp and cut out the whimsical bear, snowman or reindeer, stamp a holiday greeting on their sign, then add finishing touches with the candy canes, Santa beard, evergreen trees and more! This CHRISTMAS CREW BUNDLE will give you fun tools to create festive holiday cards and tags. We've combined the CHRISTMAS CREW BUNDLE with the classic colors and patterns in the TIMELESS CHRISTMAS 12 X 12 DESIGNER PAPER! You'll get step-by-step tutorials for FOUR cards and TWO Advent Treat Box ideas for a total of 6 tutorials, all full of handmade charm. See more details HERE!


That is an adorable box
What a cute box! Love it!
This is adorable. I am wishing I had this stamp set, but already scrambling for what do I have that I could use to make something this cute?