
PLAYFUL GHOSTS
I just got this Playful Ghosts on my last order. It really is a cute Halloween set! I would have LOVED some dies to go with it…with a few extras! Oh well! It worked SO well for today’s pop-up surprise card!

Stampin’ Details:
- The base is 5-1/2 x 8-1/2 Pumpkin Pie cardstock, scored at 2-1/8″ from each end to form the gatefold card.
- Two 2 x 5-3/8″ pieces of Flowering Zinnias DSP were added to the front panels.
- I scored the 4 x 8 piece of Flowering Zinnias DSP at 2, 4 and 6. Then scored diagonally on each end to form an X from the center to each of the ends.

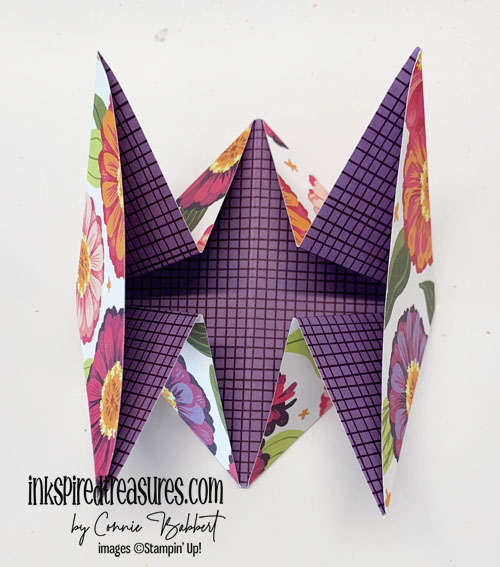
- The straight vertical lines were Mountain folded and the X’s were Valley folded, then folded together to create the pop-up mechanism as shown above.
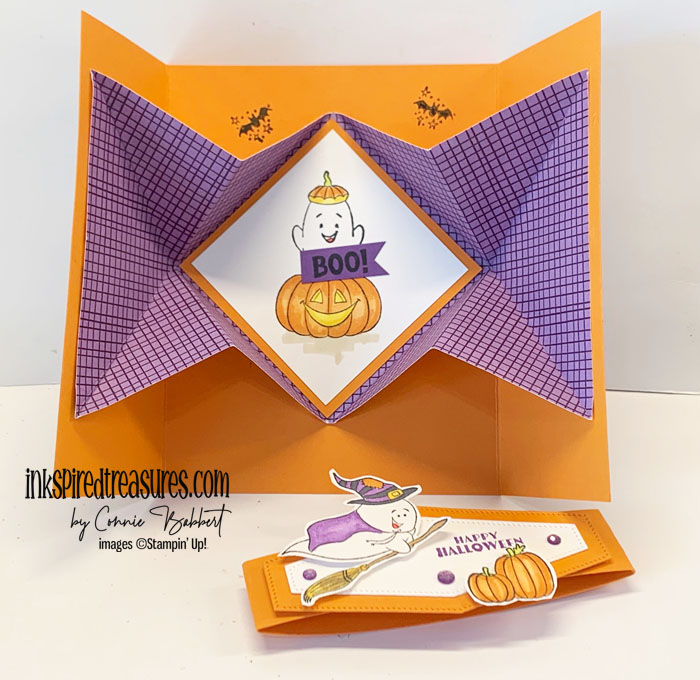
- A 2-3/4 x 2-3/4 piece of Pumpkin Pie cardstock was added to the center diamond.
- The 2-1/2 x 2-1/2 piece of Basic White cardstock was stamped with the pumpkin ghost and colored with Pumpkin Pie Combo, Daffodil Delight Combo, Light Lemon Lime Twist, Light Crumb Cake Stampin’ Blends. It was added to the Pumpkin Pie piece.
- I stamped Boo with Memento Black Ink on 3/8 x 1-1/4 strip of Gorgeous Grape cardstock and cut a flag end and then added to the ghost.
- The two side triangles were adhered to the inside of the base Pumpkin Pie card approx. 1/4″ from the edge on each side panel. This creates the pop-up when the card is opened!
- A couple bats were stamped with Memento Black Ink at the top.
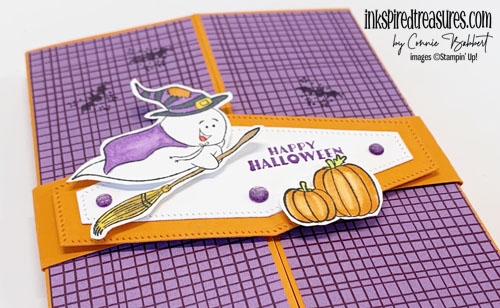
- The 1 x 11 Pumpkin Pie cardstock belly band was wrapped around the closed card and adhered.
- I cut the second from smallest Nested Essential Die shape from Pumpkin Pie cardstock and the smallest from Basic White cardstock and adhered together.
- The Happy Halloween greeting was stamped with Gorgeous Grape Ink towards the right.
- The witch ghost and pumpkins were stamped with Memento Black Ink on scrap Basic White cardstock and colored with Light Basic Black, Highland Heather Combo, Pumpkin Pie Combo, Light Lemon Lime Twist, Dark Daffodil Delight and Light Pecan Pie Stampin’ Blends, then hand-cut and added to the Nested Essentials piece with Stampin’ Dimensionals. It was adhered to the belly band with Stampin’ Dimensionals.
- A trio of Purple Fine Shimmer Gems were added to the Nested Essentials label.
- Some bats were stamped on the front DSP panels with Memento Black Ink.
Isn’t that just SO cute! And the pop-up surprise is perfect for Halloween! OK, next up on our blog hop is our Create with Stamping Friends website, then on to creative Debbie Henderson, or head backwards to see Melissa Davies’ fabulous project and see what everyone did with this challenge!



SUPPLIES:
Stamps: Playful Ghosts
Inks: Memento Black, Gorgeous Grape
Blends: Pumpkin Pie, Daffodil Delight, Lemon Lime Twist, Crumb Cake, Basic Black, Pecan Pie, Poppy Parade
Cardstock: Basic White, Pumpkin Pie, Gorgeous Grape, Flowering Zinnias 12×12 Designer Paper
Accessories: Nested Essentials Dies, Purple Fine Shimmer Gems, Scoring Tool, Adhesives

Create the feel of a nature walk through the winter woods with Stampin' Up! FROSTED PINECONES BUNDLE! Stamp the pinecone and then add textured details using the FROSTED PINECONES DECORATIVE MASKS or cut the detailed shapes with the FROSTED PINECONES DIES. Add one of the heartfelt winter sentiments to finish it off. We've paired the FROSTED PINECONES BUNDLE with the WHISPERING WOODS 12x12 DESIGNER PAPER. Our FROSTED PINECONES COLLECTION gives you step-by-step tutorials for FOUR cards and TWO small decor ideas for a total of SIX tutorials, all full of seasonal charm. See more details HERE!

Boo! October brings Halloween and the playful images in Stampin' Up!'s WEB OF FUN BUNDLE will create a little spooky fun on your cards, paper crafts, and scrapbook pages! The large greetings and detailed spiders and webs will fill your project space with eerie delights! We've paired the WEB OF FUN BUNDLE with the FRIGHTENING FUN 12x12 DESIGNER PAPER containing even more Halloween patterns and designs! Our WEB OF FUN COLLECTION gives you step-by-step tutorials for FOUR cards and TWO favor ideas for a total of SIX tutorials, all full of festive Halloween charm. See more details HERE!
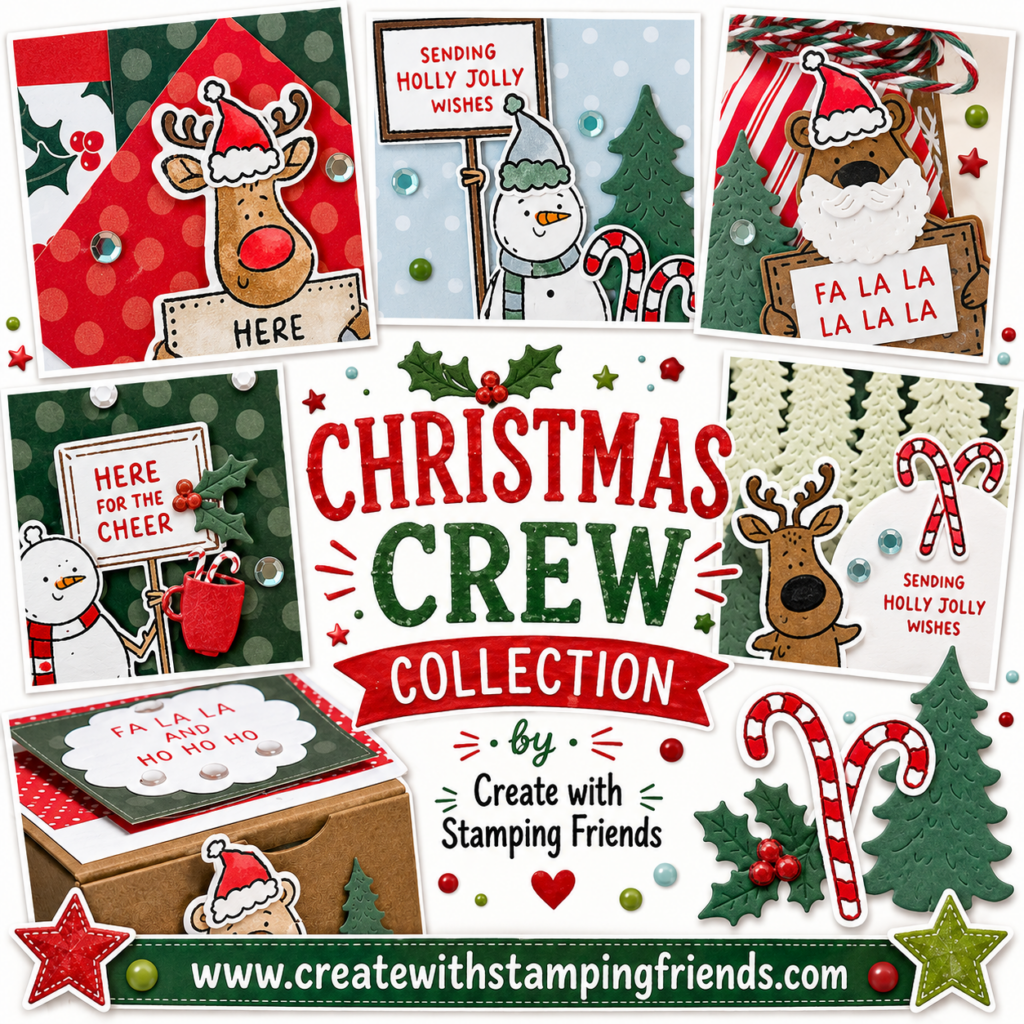
The playful critters in Stampin' Up!'s CHRISTMAS CREW BUNDLE will certainly brighten your day! Stamp and cut out the whimsical bear, snowman or reindeer, stamp a holiday greeting on their sign, then add finishing touches with the candy canes, Santa beard, evergreen trees and more! This CHRISTMAS CREW BUNDLE will give you fun tools to create festive holiday cards and tags. We've combined the CHRISTMAS CREW BUNDLE with the classic colors and patterns in the TIMELESS CHRISTMAS 12 X 12 DESIGNER PAPER! You'll get step-by-step tutorials for FOUR cards and TWO Advent Treat Box ideas for a total of 6 tutorials, all full of handmade charm. See more details HERE!


Adorable, Connie!
Thanks, Karen!!!