
MARKET GOODNESS
This is the first time my Market Goodness Bundle is seeing any ink! When my kids were younger, we had a small vegetable garden in the back yard that did really well…mostly tomato plants, but a few cucumber plants and a bell pepper plant or two. We always had fun running out to the garden to pick fresh produce! This set reminds me of those times! I just picked up a patio tomato plant this year…it has a few small tomatoes on it, so hoping it does well at this house!

- The base is 4-1/4 x 11 Soft Sea Foam cardstock, scored at 5-1/2 and folded.
- The 4 x 5-1/4 has a piece of vegetable To Market Designer Paper (measure 4 x 5 and cut in half diagonally) added to the front. A 1/2 x 8 strip of green check To Market DSP was added across the seam and the ends trimmed, then added to the front.
- The Countryside Corners shape was cut from Basic White cardstock and added to the front with Stampin’ Dimensionals.
- On scrap Basic White cardstock, two lettuce heads were stamped with Soft Sea Foam and Garden Green Inks; two beets with Real Red and Old Olive Inks; a carrot bunch with Soft Sea Foam and Pumpkin Pie Inks; and the tomato cluster with Garden Green and Real Red Inks. They were cut with the Market Goodness Dies and added to the label with Stampin’ Dimensionals.
- Hello from Market Goodness was stamped with Memento Black Ink on 1/2 x 1-1/2 Garden Green cardstock and added to the label under the veggies.
- A trio of light and dark green Transparent Adhesive Backed Dots were added in the background.

LOVE how this turned out! OK, next up on our blog hop is our Create with Stamping Friends website, then on to creative Debbie Henderson, or head backwards to see Melissa Davies’ fabulous project and see what everyone did with this challenge!


SUPPLIES:
Stamps: Market Goodness
Inks: Memento Black, Real Red, Old Olive, Garden Green, Soft Sea Foam, Pumpkin Pie
Cardstock: Basic White, Garden Green, Soft Sea Foam, To Market Designer Paper
Accessories: Market Goodness Dies, Countryside Corners Dies, Transparent Adhesive Backed Dots, Adhesives


Create the feel of a nature walk through the winter woods with Stampin' Up! FROSTED PINECONES BUNDLE! Stamp the pinecone and then add textured details using the FROSTED PINECONES DECORATIVE MASKS or cut the detailed shapes with the FROSTED PINECONES DIES. Add one of the heartfelt winter sentiments to finish it off. We've paired the FROSTED PINECONES BUNDLE with the WHISPERING WOODS 12x12 DESIGNER PAPER. Our FROSTED PINECONES COLLECTION gives you step-by-step tutorials for FOUR cards and TWO small decor ideas for a total of SIX tutorials, all full of seasonal charm. See more details HERE!

Boo! October brings Halloween and the playful images in Stampin' Up!'s WEB OF FUN BUNDLE will create a little spooky fun on your cards, paper crafts, and scrapbook pages! The large greetings and detailed spiders and webs will fill your project space with eerie delights! We've paired the WEB OF FUN BUNDLE with the FRIGHTENING FUN 12x12 DESIGNER PAPER containing even more Halloween patterns and designs! Our WEB OF FUN COLLECTION gives you step-by-step tutorials for FOUR cards and TWO favor ideas for a total of SIX tutorials, all full of festive Halloween charm. See more details HERE!
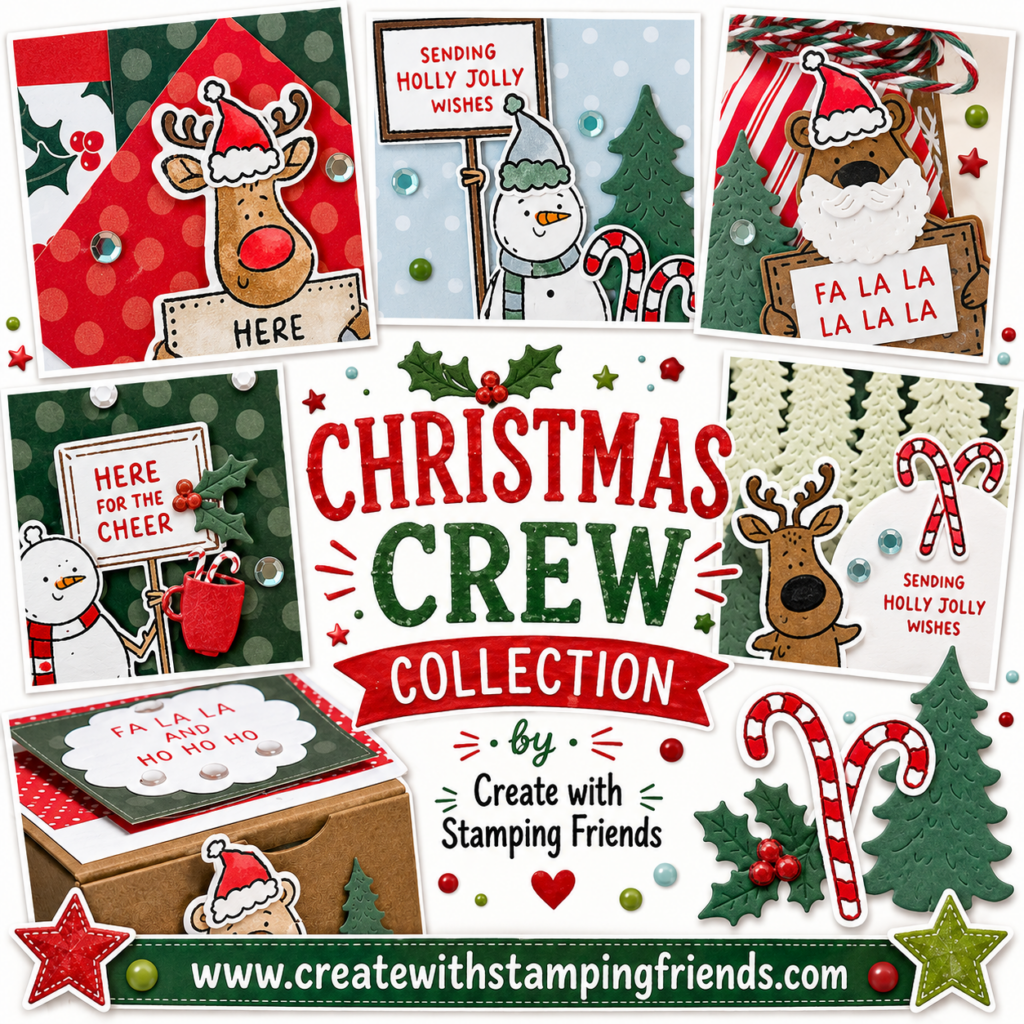
The playful critters in Stampin' Up!'s CHRISTMAS CREW BUNDLE will certainly brighten your day! Stamp and cut out the whimsical bear, snowman or reindeer, stamp a holiday greeting on their sign, then add finishing touches with the candy canes, Santa beard, evergreen trees and more! This CHRISTMAS CREW BUNDLE will give you fun tools to create festive holiday cards and tags. We've combined the CHRISTMAS CREW BUNDLE with the classic colors and patterns in the TIMELESS CHRISTMAS 12 X 12 DESIGNER PAPER! You'll get step-by-step tutorials for FOUR cards and TWO Advent Treat Box ideas for a total of 6 tutorials, all full of handmade charm. See more details HERE!


Leave a Reply