It’s Saturday and time for our Create with Stamping Friends Blog Hop. This week’s theme is “Spotlight on Vellum!
OH MY FRIGHT
Vellum is one of the products I don’t think about using much…but I always love the delicate look it adds to projects!
Unrelated…but did you see the news that Stampin’ Up! MULBERRY PAPER is coming back in stock for the November Online Exclusives? I haven’t used that in YEARS…I wonder if I still have some stashed somewhere? lol!
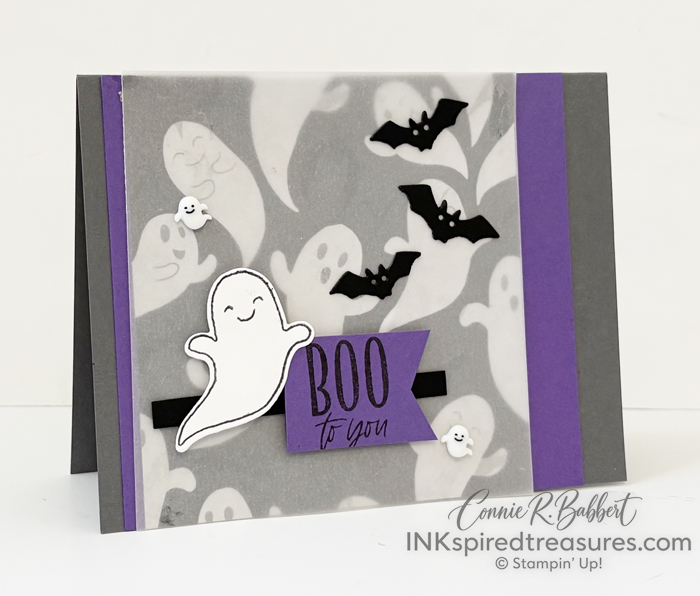
- The base is 5-1/2 x 8-1/2 Basic Gray cardstock, scored at 4-1/4 and folded.
- A 4-1/4 x 4-3/4 piece of Gorgeous Grape cardstock was added slightly towards the left edge.
- The ghost Frightfully Fun DSP was added towards the left edge of the Gorgeous Grape layer, then a 4-1/4 x 4-3/4 piece of Cardstock Vellum was added on top.
- TIP: Place the adhesive on the white ghosts so that it doesn’t show thru the vellum as much!
- Adhere a 1/4 x 3 strip of Basic Black towards the bottom left corner.
- On the 1-1/4 x 1-3/4 piece of Gorgeous Grape cardstock, stamp BOO with Basic Black Ink. Cut a flag end and added over the Basic Black strip with Stampin’ Dimensionals.
- Stamp the ghost with Basic Black Ink on Basic White cardstock and cut with the Oh My Fright Die. Adhere it next to the greeting with Stampin’ Dimensionals.
- Cut the bats with the Die from Basic Black cardstock and adhere flat to the vellum with Monoadhesive Glue.
- Add two Adhesive Backed Ghosts, Bats & Dots to the background.
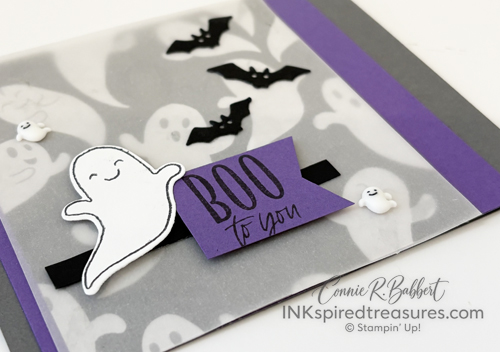
I love that Vellum can take a busy pattern and mute it into the background! OK, next up on our blog hop is our Create with Stamping Friends website, then on to creative Debbie Henderson, or head backwards to see Melissa Davies’ fabulous project and see what everyone did with this challenge!


SUPPLIES:
Stamps: Oh My Fright
Inks: Basic Black
Cardstock: Basic Gray, Basic Black, Gorgeous Grape, Basic White
Designer Paper: Frightfully Fun 12×12
Accessories: Oh My Fright Dies, Adhesive Backed Ghosts, Bats & Dots, Adhesives
But first check out our current Collection…

How fun to create a traditional Christmas Village using Stampin' Up!'s WELCOME NOEL BUNDLE! Stamp the houses, trees and deer elements to build your holiday scene or cut them quickly with the detailed shapes and the WELCOME NOEL DIES. We used greetings from the Winter Adventures stamp set or use your own sentiments to finish it off. We've paired the WELCOME NOEL BUNDLE with the WINTER DREAMS 12x12 DESIGNER PAPER featuring white on deep blue designs for your winter-themed crafts. Our WELCOME NOEL COLLECTION gives you step-by-step tutorials for FOUR cards and TWO enhanced special fold card ideas for a total of SIX tutorials to use in your classes or personal use. See more details HERE!

Create the feel of a nature walk through the winter woods with Stampin' Up! FROSTED PINECONES BUNDLE! Stamp the pinecone and then add textured details using the FROSTED PINECONES DECORATIVE MASKS or cut the detailed shapes with the FROSTED PINECONES DIES. Add one of the heartfelt winter sentiments to finish it off. We've paired the FROSTED PINECONES BUNDLE with the WHISPERING WOODS 12x12 DESIGNER PAPER. Our FROSTED PINECONES COLLECTION gives you step-by-step tutorials for FOUR cards and TWO small decor ideas for a total of SIX tutorials, all full of seasonal charm. See more details HERE!

Boo! October brings Halloween and the playful images in Stampin' Up!'s WEB OF FUN BUNDLE will create a little spooky fun on your cards, paper crafts, and scrapbook pages! The large greetings and detailed spiders and webs will fill your project space with eerie delights! We've paired the WEB OF FUN BUNDLE with the FRIGHTENING FUN 12x12 DESIGNER PAPER containing even more Halloween patterns and designs! Our WEB OF FUN COLLECTION gives you step-by-step tutorials for FOUR cards and TWO favor ideas for a total of SIX tutorials, all full of festive Halloween charm. See more details HERE!


Such a fun card!
Thanks!