Our Creatively Simple theme this month is “Patterns”! Stampin’ Up! has fabulous designer paper with patterns. This week I did a little a “Ribbon Pinwheel” technique that I saw Wendy Lee do using DSP! SO cute!
FRAGRANT LAYERS
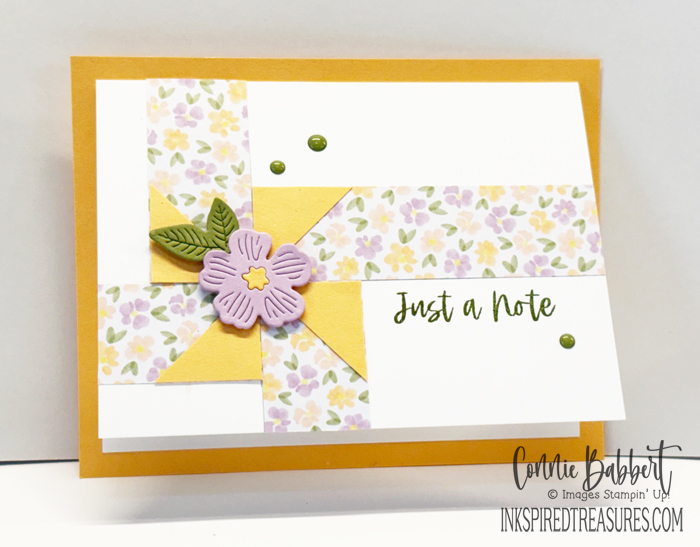
- The base is 4-1/4 x 5-1/2 Peach Pie cardstock.
- A card fold using 5 x 7-1/2 of Thick Basic White is scored at 3-3/4. Use a pencil and mark 1-1/2″ from the bottom across, and 1-1/2 from the left side down to form an intersecting point.
- Pieces of Lovely & Beautiful DSP are cut (purposely longer than needed) to:
- 1 x 4
- 1 x 2-3/4
- 1 x 2 (cut TWO)
- NOTE: A non-directional print works best.
- Cut TWO 1 x 1 Peach Pie cardstock squares and then cut each diagonally in half. Adhere them with the point to the upper right corner on each DSP piece.
- Adhere the long DSP along the pencil line from the intersecting point to the right side.
- Adhere the next size from intersecting point to top.
- Adhere one of the shorter to the left under the line and the last next to it below the longer one.
- Trim off the excess DSP along the edges.
- Stamp the greeting with Old Olive Ink under the long piece.
- Adhere fold card to the base piece.
- Cut the small flower from Fresh Freesia cardstock and the center from Peach Pie cardstock. Adhere at the intersection with Stampin’ Dimensionals.
- Cut the leaf duo from Old Olive cardstock and tuck under the flower.
- Add 1 large and 2 small green Moody Palette Glossy Dots to the background.
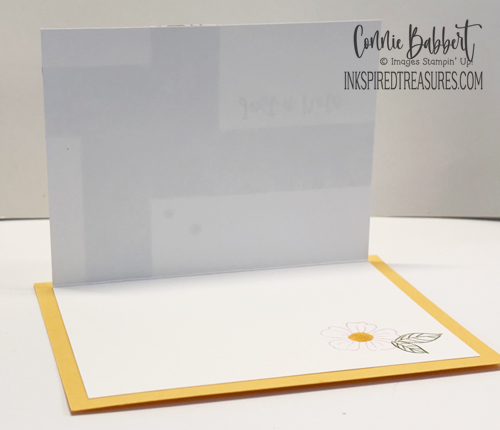
- INSIDE: Stamp flower with Fresh Freesia Ink, center with Peach Pie Ink, leaves with Old Olive Ink.
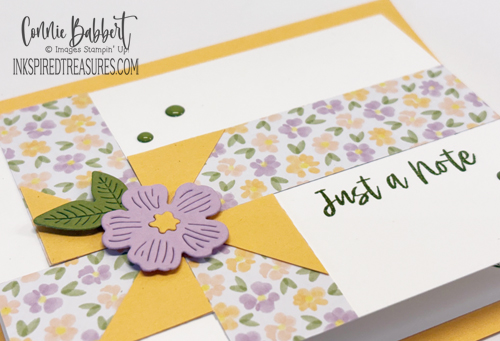
Isn’t that a fun use of DSP pattern scraps? OK check out Debbie’s new Creatively Simple card over on Create with Stamping Friends!

Supplies:
Stamps: Fragrant Layers
Inks: Old Olive
Cardstock: Thick Basic White, Peach Pie, Old Olive, Fresh Freesia
Designer Paper: Lovely & Beautiful 12×12
Accessories: Fragrant Layers Dies, Moody Palette Glossy Dots, Adhesives


These playful little gnomes in Stampin' Up!'s MERRY MISCHIEF BUNDLE are ready to take the place of elves for the holidays! In additionn, the MERRY MISCHIEF DIES include a fun mushroom home, bells, Christmas lights and packages to accessorize them! The whimsical greetings will finish your projects with a lighthearted twist. We've paired the MERRY MISCHIEF BUNDLE with the TIMELESS CHRISTMAS 12x12 DESIGNER PAPER featuring traditional reds and green prints! Our MERRY MISCHIEF COLLECTION gives you step-by-step tutorials for FOUR cards and TWO fun favors for a total of SIX tutorials to use in your classes or personal use. See more details HERE!

Be ready to deck the halls with Stampin' Up!'s HOME FOR CHRISTMAS BUNDLE featuring a cute gingerbread man, whimsical tree, holly, and peppermint images and dies! The HOME FOR CHRISTMAS DIES also include fun tag and pocket shapes, plus a scallop border! The classic greetings will finish your projects with some festive cheer. We've paired the HOME FOR CHRISTMAS BUNDLE with the TIMELESS CHRISTMAS 12x12 DESIGNER PAPER featuring traditional colors, plaids and stripes for your seasonal-themed crafts. Our HOME FOR CHRISTMAS COLLECTION gives you step-by-step tutorials for FOUR cards and TWO gift card holders for a total of SIX tutorials to use in your classes or personal use. See more details HERE!

How fun to create a traditional Christmas Village using Stampin' Up!'s WELCOME NOEL BUNDLE! Stamp the houses, trees and deer elements to build your holiday scene or cut them quickly with the detailed shapes and the WELCOME NOEL DIES. We used greetings from the Winter Adventures stamp set or use your own sentiments to finish it off. We've paired the WELCOME NOEL BUNDLE with the WINTER DREAMS 12x12 DESIGNER PAPER featuring white on deep blue designs for your winter-themed crafts. Our WELCOME NOEL COLLECTION gives you step-by-step tutorials for FOUR cards and TWO enhanced special fold card ideas for a total of SIX tutorials to use in your classes or personal use. See more details HERE!


