I just placed a BUNCH of retired Halloween and Christmas Stamp Sets on my For Sale page!
Check them out HERE! First come, first served. Prices do not include shipping…include your zipcode with your email so I can figure it for you!
Connie Babbert, Stampin Up! Demonstrator
By Connie | Leave a Comment
I just placed a BUNCH of retired Halloween and Christmas Stamp Sets on my For Sale page!
Check them out HERE! First come, first served. Prices do not include shipping…include your zipcode with your email so I can figure it for you!
By Connie | 4 Comments
I'm going to play a little teasing game with you over the next couple posts. I did this a couple years ago. As most of you know, I am a member of the Control Freak Swappers. Some BIG creative names in this group (should I name drop? lol…) Anyway…I always want to make my swaps EXTRA special…this one for the Holiday Mini swap. I frequently do up 3-4 different swap card ideas before I hit on the one that will be my final swap card for them.
Here is my first prototype. I did LOVE it…but didn't want to cut out 30 of those little witches to sit on top of her ledge! AND…I didn't want to cut out 90 of the BOO letters from the Silver Glimmer Paper either (3 x 30). I do love the Halloween Hang-ups Jumbo Wheel…very cool hanging down.

Anyway…the base of my card is Sahara Sand. I layered on Basic Black. On the top layer of Sahara Sand, I ran the Halloween Hang-ups Jumbo Wheel across the bottom in Basic Black. I added a strip of Pumpkin Pie cardstock on top. Then I cut a strip of the Pick Your Poison Designer Paper and scored it with the new Simply Scored Tool every 1/4". I pleated it back and forth and then attached it to the front to hide the seam between the Sahara Sand and the Pumpkin Pie cardstocks. I ran my Basic Black Ink Pad across the tops of the pleats for a little aging, too, and cut the end with my 1" Square Punch for a pennant shape. I also added two Basic Black Mini Brads to the end.
On top of the Designer Paper, I stamped the witch in Basic Black on Whisper White, then cut her out. I placed her on her perch with Stampin' Dimensionals. I cut out BOO from Timeless Type Junior Alphabet dies with the Big Shot and the Silver Glimmer Paper and adhered across the top, too.
A very fun card, but just a little time consuming to make 30 for a swap. So…stay tuned for Round 2! Hope you come back to check it out!
.png)
WOW! Our Designers have started sending in their projects and tutorials…all I can say is WOW! You will be so amazed at the talent in this Edition! Create with Connie and Mary is getting ready for our SEVENTH Edition, the Holiday Edition 2011! We've started Early Bird Pricing…save $5 off the normal $34.95 US! At only $29.95, your subscription will get you 6 weeks of daily projects with FULL step-by-step tutorials, challenges, and a chance to win prizes. That is less than $1 a day, and is a HUGE bargain! Don't wait…sign up today!
By Connie | 10 Comments
Woohoo! HAPPY SEPTEMBER! You can NOW order from the Stampin' Up! Holiday Mini! That little mini is just PACKED full of great stuff! At Convention, Stampin' Up! gave everyone this hostess set, Warmest Wishes. SO cute! Now you can get it, too, with your hostess credits!
Today, Create with Connie and Mary has a color challenge for you! And…I was challenged! lol! I started this card, then had to let it sit for a while. Tore off the wreath element and started the base again. Now I like how it turned out, but it was touch and go for a while!

I've learned that when I'm working with bold, saturated colors such as these, that it is good to layer them up with neutrals. I looked for some Designer Paper that used Rich Razzleberry, and found this one in Pocketful of Posies. Since it used Whisper White as an accent, I used that as my neutral.

I started with a base of Pumpkin Pie for my card. I cut the Whisper White and ran it thru the Big Shot with the Perfect Polka Dots Impressions Folder. Then I layered it on Lucky Limeade to pull out that color from the wreath. I used my Lucky Limeade, Rich Razzleberry and Pumpkin Pie markers to ink up the wreath stamp from Stampin' Up!'s Warmest Wishes stamp set, stamped on Whisper White and used the 1 1/4" Circle Punch to punch out the center and the 2 3/8 Scallop Circle Punch to punch it out entirely. I tied Pumpkin Pie and Rich Razzleberry 1/4" Grosgrain Ribbon around the wreath. I punched a 1 3/4 Circle of Pumpkin Pie to place behind the wreath and added the Sending Many Thanks from Petite Pairs in the center with Rich Razzleberry ink.
I layered the Rich Razzleberry print on the Whisper White. Next, I used the Rectangle Frame Impressions Folder and Lucky Limeade in the Big Shot and cut it out. I added two Rhinestone Jewels in the bottom corner of the frame. Last I added the Wreath element with Stampin' Dimensionals!
So, although it is nothing like what I started with…except for the wreath…I like how it turned out! Make sure to check out what the rest of the Create with Connie and Mary Design Team did this week! Again…everyone did VERY different cards using this color combo. Got to love it! (And…hey…while you are there, go ahead and sign up for the Create with Connie and Mary Holiday Edition 2011! Early Bird savings of $5 off is going on now! For a price of $29.95, you will get over 36 Step-By-Step Photo Tutorials…that is less than $1 each!)
.png)
By Connie | 5 Comments
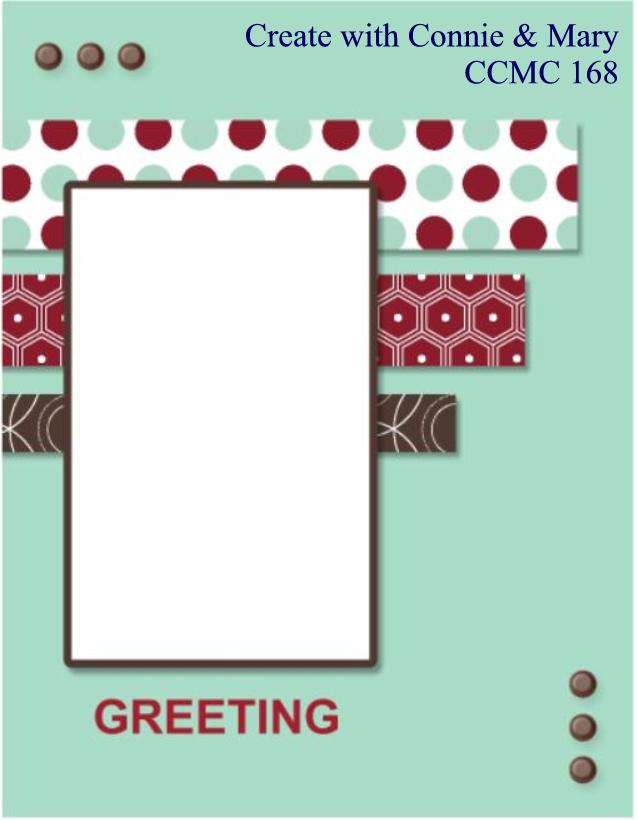
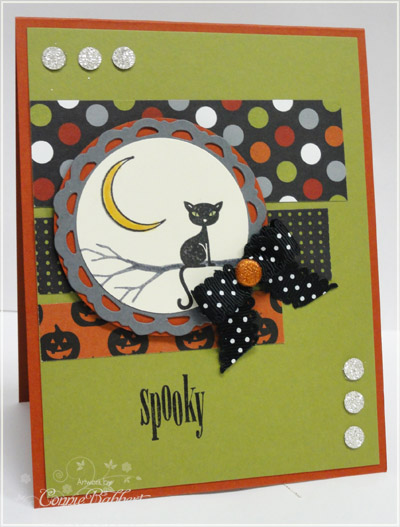
Wednesdays are sketch challenge days over on SCS and I try to remember to look at them! Today's looked really fun, so I thought I'd participate!

I wanted to use a new set in the Holiday Mini, Out on a Limb, for my card! These little images are cute, and small, so I was challenged to make them appear large enough for the large panel on the front of this sketch!

I chose the Designer Paper first, Stampin' Up!'s Frightful Sight, which gave me my color scheme. The base of the card is Cajun Craze. I layered on the Frightful Sight polka dot pattern down the center. I added a second Cajun Craze polka dot pattern for one of the panels and layered it on Basic Gray. Now…originally I had a white panel over the front Basic Gray panel…but it just looked to stark. So, I had the idea to stamp directly on the Basic Gray…making it look dark and spooky…like Halloween should be! I stamped some clouds from the Out on a Limb set in Basic Gray, then added even more with my sponge and a scrap Scallop Circle. I masked the cloud so I could stamp the moon from the same set in the background…then colored it with a White Gel Pen. The Out on the Limb tree is stamped with Basic Black, and the same with the hanging bats from that set. Finally, I used the Color Spritzer Tool for some added texture in the corners.
I wrapped the Black Satin Ribbon around and tied with a knot on the front. I used the Spooky greeting from Stampin' Up!'s Halloween Bingo Bits and colored each of the letters with my Stampin' Write Markers. I used the Spritzer on it, too, then punched the Whisper White with my 1" Circle punch, layered on the Cajun Craze 1 1/4" Circle and finally the Old Olive 1 3/8" Circle. I'm so happy with how this turned out! A little trial and error, but it did work!
This is just one of the sets we will be featuring during Halloween week on Create with Connie and Mary Holiday Edition 2011! We also will do a Fall Week, and several weeks of Christmas. Oh…we have a special product week, too, that promises to be SO inspiring! Here are the details on how you subscribe!
.png)
Create with Connie and Mary is getting ready for our SEVENTH Edition, the Holiday Edition 2011! We've started Early Bird Pricing…save $5 off the normal $34.95 US! At only $29.95, your subscription will get you 6 weeks of daily projects with FULL step-by-step tutorials, challenges, and a chance to win prizes. That is less than $1 a day, and is a HUGE bargain! Don't wait…sign up today! Click on the BUY NOW button on my right sidebar!
By Connie | 12 Comments
Shelli Gardner, Stampin' Up! owner and CEO, is always an inspiration. I love to see what is going on with her life on her blog. I noticed she had a "Thinking of You" Creative Challenge this month and decided to create a card for her challenge. Of course, I saw it at the BEGINNING of the month…and now it is almost the END. So…I'd better get it done before it is too late!
Most of you know, I love playing with punch art! I was teaching punch art classes LONG before they became so popular! You saw the first Fall Trees Punch Art I did HERE the other day. Here is my second one using the Doily Punch! I love having several uses for my punches…other than what they were originally intended to make. The Doily one had been stumped for a long time. In fact, it sat unused on my desk for probably 2 months! I know! Another thing I haven't used is the Rectangle Frame embossing folder. I've used the Oval Frame…just not the Rectangle one. So…it is featured on here, too! I hope it is clear that I was trying to make a "picture frame" of the tree. Kind of like…I'm looking at your picture and thinking of you? Corny? lol! Well, that is the way my mind sometimes works!

So..onto the details! I took my colors from the scrap of Stampin' Up!'s Spice Cake Designer Paper (available in the Holiday Mini!) I had on my desk. The base of the card is More Mustard. I cut the Very Vanilla and ran it thru the Big Shot with the Stripes Impressions Folder, then layered the Spice Cake Designer Paper on the bottom. I covered the seam with a strip of More Mustard cardstock, cut the banner end and added the Thinking of You from Stampin' Up!'s Teeny Tiny Wishes stamp set in Early Espresso Classic Ink. The Very Vanilla was layered on Early Espresso for some added depth. I cut the Rectangle Frame from Pool Party cardstock. I added my Fall Tree. The trunk is the Large Oval punched on each side of a strip of Early Espresso cardstock. The top of the tree is Cajun Craze cardstaock full punched Doily Triple Layer Punch layered on a solid More Mustard Doily punch. The leaves on the ground are the little punchlets left over. I added a tiny Mini Brad in the center of the tree and popped it up with Stampin' Dimensionals. I "hung" it on the wall with some Linen Thread hanging off another tiny Mini Brad and more Stampin' Dimensionals.
I love how my Fall Picture Frame Tree turned out! Hope you are inspired, too! (And that Shelli likes it!)
.png)
Did you see? Create with Connie and Mary has a NEW BLOG LOOK, getting ready for our SEVENTH Edition, the Holiday Edition 2011! We've started Early Bird Pricing…save $5 off the normal $34.95 US! At only $29.95, your subscription will get you 6 weeks of daily projects with FULL step-by-step tutorials, challenges, and a chance to win prizes. That is less than $1 a day, and is a HUGE bargain! Don't wait…sign up today! Click on the BUY NOW button on my right sidebar!
By Connie | 8 Comments
Occasionally, I goof when I make up my packets of card supplies for a class or club. This month I had an extra packet of each Club card and I've promised myself that I would make the extras before I put the supplies away. Well, I saw the sketch today from The Paper Players (PP61) and knew that one of the card packets could be re-worked to fit in with their sketch! Woohoo! Love it when a plan comes together!
.png)
I decided I wanted to use Stampin' Up!'s new Creative Expressions stamp set in the big catalog! All the stamps I used on this card are in that set…and I didn't even use them ALL! It wasn't one that immediately grabbed me and said BUY ME…but I did get it free with my hostess benefits from the preorder I put in. And, it has really grown on me! I love it now!

Now, I'm not one who would have originally put these colors together, but I DO love them! I have Elizabeth Price to thank…I received a swap card at Convention from her with this color scheme. I paired it up with the LUCIOUS Mocha Morning Designer Paper! That paper is GORGEOUS! (Elizabeth is one of the Create with Connie and Mary Design Team Members for the Holiday Edition 2011! Makes sure to check out the announcement with the bios of the Design Team. Our Early Bird Special Price of $29.95 US for SIX weeks of daily ideas and tutorials just started!)
First I started with the base of Pool Party and layered on Soft Suede cardstock. I added the small strip of Mocha Morning Designer Paper down the center. I used Confetti Cream and cut out 1/2 of the Top Note with the Big Shot. Over that, I popped up the new Oval Frame cut from Pool Party and stamped with the backbround filigree from Creative Elements in Soft Suede ink. I stamped the long label in Basic Black on Confetti Cream and cut it out. I also stamped the butterfly and Create word in Soft Suede and cut out the butterfly and punched the Create with the Modern Label punch. The Oval Frame and the Butterfly were popped up with Stampin' Dimensionals. I added the Pool Party Ruffled Ribbon around the card to hide the bottom of the Top Note. Then I added several Rhinestone Jewels to the label, the butterfly body and the Create swirl.
I love how it turned out and think it is pretty close to the interpretation of The Paper Players sketch by Jaydee! At least you can tell I was inspired by her sketch with my card!
I have a couple days FREE to create in my studio! My son had to use my car today since his broke down…now no excuses that I have to run errands either! Hope you have a wonderfully creative day, too!
By Connie | Leave a Comment
I wanted to use Stampin' Up!'s hostess only stamp set, Warmest of Wishes. That little Halloween Owl is just TOO cute! When we received this set for FREE at Convention, I was just TOO excited! So, I'm a LITTLE early using it…it is in the Holiday Mini that you'll be able to get next week with your hostess dollars! I was looking for a sketch and the latest Create with Connie and Mary CCMC 164 was sitting on top of my desk. Why not use it again? No rules that I can only use it one time, right? I adapted it just a little for my set. So, here is my SECOND card using the sketch!

I also had this strip of Pick Your Poison Designer Paper (Holiday Mini) sitting out from another project, so I took my colors from it. I started with a base of Pumpkin Pie. I layered on Basic Gray cardstock. I stamped the Halloween Owl in Basic Black in the bottom right corner of the Sahara Sand. I stamped him again on Pumpkin Pie, cut out the bag and his mask and placed it over the Basic Black. The beak I colored with Daffodil Delight Marker. I also "grounded" him by using a little Sahara Sand marker under his feet. Don't like to have my critters "floating" in the air! lol!
I decided to dress up the left side with ribbon and the Basic Black Taffeta was just muted enough to go with the Basic Grays in the Designer Paper. I added two Black Glimmer Brads by piercing thru the cardstock and then placed the brad around the ribbon to sort of gather it.
I stamped the words Happy Halloween from Stampin' Up!'s Delightful Dozen stamp set in Basic Black on Pumpkin Pie, then punched with the Modern Label punch and placed it above the owl. I like how this card turned out! Enjoy!

Did you see? Create with Connie and Mary has a NEW BLOG LOOK, getting ready for our SEVENTH Edition, the Holiday Edition 2011! We've started Early Bird Pricing…save $5 off the normal $34.95 US! At only $29.95, your subscription will get you 6 weeks of daily projects with FULL step-by-step tutorials, challenges, and a chance to win prizes. That is less than $1 a day, and is a HUGE bargain! Don't wait…sign up today!
By Connie | 28 Comments
Whew…I finally feel like I'm getting caught up on everything that was put on hold before the wedding and have time to look around at some different challenges to do! This Challenge Sketch PP60 from The Paper Players really caught my eye! It was designed by LeAnne Pugliese. Like LeAnne, I love the rule of three!

So, you can see from my card that I took a little liberty of the sketch and moved my sentiment…it just didn't fit on my card where the sketch placed it. I originally made the Punch Art Fall Trees for my August Punch Class. I switched up the layout of my original class card so that it would fit the Paper Players sketch this week. I've added a sneak peek of one of the new Stampin' Up! Holiday Mini stamp sets, It's A Wrap Holidays! I cut out just the greeting part "Give Thanks" to use on my card.

I started with a base card of Old Olive cardstock. I layered on Bashful Blue and sponged the clouds in the background with Bashful Blue Ink and the edge of a Scallop Circle. Along the bottom, I used Pear Pizzazz Patterns Designer Paper and tore the strip in half to make the ground. The tree trunks were made by using the Large Oval Punch on each side of a strip of Chocolate Chip cardstock. Of course, I used the Doily Triple Layer Punch to make the tops of the trees…in More Mustard, Cajun Craze and Pumpkin Pie. The detailed layer was placed over the solid layer of Old Olive. I used the scraps of the punches for the "leaves" on the ground. In the center of each tree is one of the new Mini Silver Brads. LOVE those tiny things! lol!
The greeting is from Stampin' Up!'s It's A Wrap Holidays as I mentioned and I just cut the Cajun Craze greeting to a 3/4" size and layered on 1" Square of Pumpkin Pie (we have a NEW 1" square punch in the Holiday Mini, too! Woohoo!!!) I added some Espresso Bakers Twine wrapped around the front to "ground" the greeting.
Out of the three cards we made at my August Punch Class, I think this was the favorite! Pretty quick and easy to make, too. Hardest part is finding those little punched "leaves" when they come out of the punch! lol!
Well, I'm hoping to have a productive day working on a few projects for our upcoming Create with Connie and Mary Holiday Edition!!! Early Bird pricing is starting SOON, so be looking for it!