Here is March's Card Kit! I LOVED featuring this set!
CARD KIT OF THE MONTH
March 2010
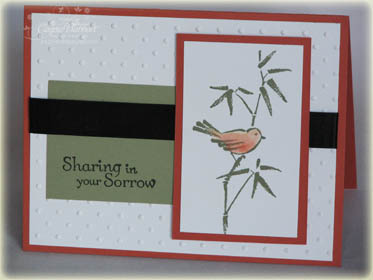
Featured Set: “Vintage Vogue”
Featured Accessory: Chocolate Chip Epoxy Brads
.jpg)
.jpg)
In this kit, you'll receive the supplies to create SIX of EACH design shown above – so you will receive all of the cardstock and ribbon supplies that you need to create 12 cards total.
You will also receive 2 additional full color samples of "alternative" cards that you can make with the combined contents of the kit, as well as step by step instructions on how to complete each of the 4 designs.
Card Kit Price is just $20 — that's 12 cards, plus envelopes for just $20!
Each month, the card kit also features both a Stamp Set of the Month and an Accessory of the Month. If you purchase the card kit, you may also purchase these items at 20% off!
February Featured Products:
- Vintage Vogue Stamp Set
(wood $23.95, clear mount $17.95))wood $19.16 or clear mount $14.36 with the purchase of the Card Kit
- Chocolate Chip Epoxy Brads
($3.25)$2.60 with the purchase of the Card Kit (You will need two sets of brads to complete all cards as shown in the examples.)
What else will you need? See the list below for items that were used to create the cards in this kit. If you already have everything — just buy the card kit and you are ready to create!
If you don't have everything–place a product order with your kit (don't forget about the discount on the "featured products!")
Or — you can use the card kit to create your own designs using other stamps and inks that you already have — the choice is yours!
Orders for the Card Kits must be received by March 21st. You will receive your kits by the end of the month.
Call or email me today to order:
Connie R. Babbert
614-792-7999
EMAIL ME
Please Note: I am glad to ship kits directly to you! If the kit needs to be shipped, there will be an extra $3 shipping charge or $4.95 with additional product ordered.
Products you will need to complete cards as shown:
- Rich Razzleberry Classic Ink Pad ($5.95)
- Orchid Opulence Classic Ink Pad ($5.95)
- Old Olive Classic Ink Pad ($5.95)
- Mat Pack ($9.95)
- Paper Piercing Tool ($3.50)
- Scallop Trim Border Punch (Free Sale-A-Bration product with $50 merchandise purchase)
- Vintage Vogue Stamp Set
(wood $23.95 or clear mount $17.95)wood $19.16 or clear mount $14.36 with the purchase of the Card Kit
- Chocolate Chip Epoxy Brads
($3.25)$2.60 with the purchase of the Card Kit (2 sets are needed to complete cards as shown)
§ Stampin’ Dimensionals ($3.95)
§ SNAIL Adhesive ($6.95)
§ Bone Folder ($6.95)
§ Paper Snips ($9.95)


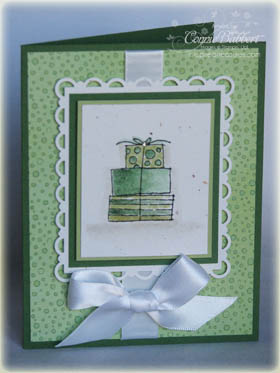
 Since my Kaleidoscope Designer Paper was already sitting out, I decided to make up another card. I wanted to show Vintage Vogue dressed up for spring! I love this set! The piece I cut from the Kaleidoscope DSP was PERFECT to hold a circle in the center and make it look like an extra mat. Totally unplanned!

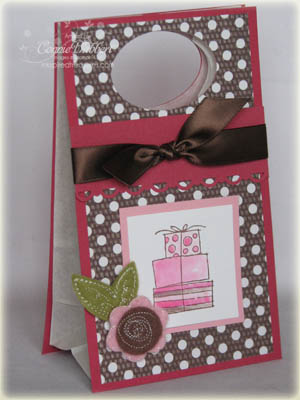 This week's Friday Bloggers' Challenge is the theme of boxes or bags! That worked out well for me, because this is the bag that my Stamp Club members made last night. I saw a card someone had made that was similar, and I thought it would be cute turned into a bag for a small gift. I love being able to papercraft a bag that matches a card that I'm giving the recipient!
.jpg) It's not too late to get my Satin Ribbon Shares. I INCLUDE the Whisper White in my shares, so you get 10 different colors! Click
It's not too late to get my Satin Ribbon Shares. I INCLUDE the Whisper White in my shares, so you get 10 different colors! Click 