Every Saturday on the Create with Connie & Julie site we issue a challenge. Our subscribers are encouraged to enter the challenge to win fabulous prizes! Last week's challenge winners were Sandra and Lisa! Congratulations, ladies!
This is Challenge #4 for Create with Connie and Julie Occasions Edition! Our challenge this week was making any type of Kids' Gift Packaging! What a FUN theme this week! Those of you who ARE subscribers, you are in for a treat! We have 3 tutorials today! I have one for my Fox & Friends Gift Boxes and our two Guest Designers, Kerin and Monika, also have tutorials for their projects! You will be inspired for sure! Those of you that aren't subscribers…well…what are you waiting for? It's not too late to join the fun and you won't miss anything, you'll still have access to all the past projects we've done!
.jpg)
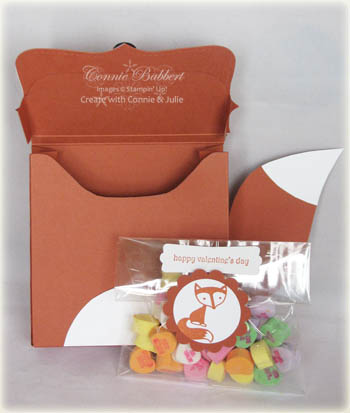 OK…I must say that I LOVE my boxes! I started with just the Fox and he turned out SO cute, I had to try a couple of the other critters in Fox & Friends. I wished I had time to make them all, but had to stop…lol! This box template is so versatile, that you could use it for LOTS of different things.
Inside mine, I made up a Small Cello Bag filled with Conversation Hearts. I folded over the top, then made a little closure. I stamped the fox from Stampin' Up!'s Fox & Friends in Really Rust on Whisper White, then punched with the 1 3/8 circle punch. I layered it on a Scallop Circle punched from Really Rust. I also stamped Happy Valentine's Day from Teeny Tiny Wishes in Really Rust on Whisper White and punched with the Modern Label punch. The Scallop Circle holds the Small Cello Bag closed!
Make sure you check out the rest of the Create with Connie and Julie Design Team's projects this week!
 If you haven't checked out the Create with Connie and Julie site yet now is the time to do it! We feature new Occasions Mini product every week. There is a new project posted every day and there will be a minimum of two fabulous tutorials each and every week. We like to have lots of fun so we have challenges and prizes for our subscribers. Our sites stay up long after the session is done so you will always have access to the site and the tutorials. For more information and to see our Preview Week projects please visit at Create with Connie and Julie.
 It's time for another Stamping 411 Sketch Challenge! This one came together pretty easy. Mainly because my Stamp Club did a similar card last night using the same colors and stamp set, but I changed it around so I could make it fit the sketch! Now it shows those in my Stamp Club who bought this set, another way to use it!
.jpg)
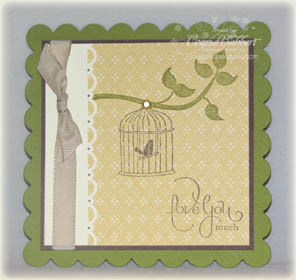 I made this card for a small swap I was in at the end of December. I love using the Scallop Square die for the base of my card! In this case, it is a cardfront, so I only used one layer of the Scallop Square.
.jpg)
.jpg)
.jpg)
.jpg)
.jpg)
.jpg)
.jpg)
.jpg)
 Today I want to show you my Control Freaks Swap for the Occasions Mini! I made these before Christmas, but didn't want to show you until everyone had their swaps…then I forgot that I hadn't posted it! lol!
 I added more layers to the center focal piece with Pale Plum cardstock layered on Perfect Plum. I stamped the vine image in Pale Plum over the Pale Plum cardstock, then used my piercing tool and mat to create the corner design. I added a 1 3/8 circle punched from Old Olive, then tucked some Old Olive leaves made with the 5 petal punch (I sponged around the edges with Old Olive). I stamped the large flower with Perfect Plum on Whisper White and cut it out and two smaller flowers with Pale Plum and cut them out. The center of the large flower has a small flower punched from Trio of Flowers, then a Jumbo White Brad in the center. The two smaller flowers have Old Olive Mini Brads in the centers.
 I stamped the Like-O-Meter image in Basic Black on Whisper White, then colored in the themometer with the Real Red Stampin' Write marker up to …a lot but not like a stalker. I added a very light coat of Crystal Effects over top of the red. You need to be careful because the marker is water based and will run if you add too much. When dry, I punched the Small Heart in the lower right corner, then layered it on Real Red, then Basic Black cardstocks. Finally I added a Black Gingham Bow to the upper left corner.
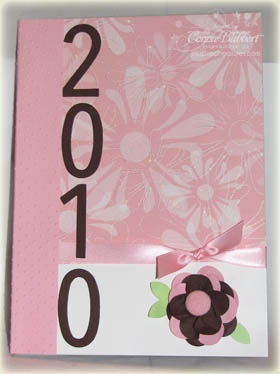 I spent the day yesterday at a good friend's house…Mindy! I took some much needed time to work on some personal stamping projects. One project was my 2010 Calendar! Each year I buy the cheap vinyl covered ones and take off the vinyl. Underneath is a light weight cardboard that I cover with our pretty designer paper! I knew the minute I saw Stampin' Up's new Sending Love Designer Paper, that I would use it for my calendar. However, I just got around to doing it!