Happy Saturday! It’s time for another Saturday Blog Hop! This week our Create with Connie and Mary theme is our “Favorite New Holiday Catalog Stamp Set”. Stampin’ Up! demonstrators are able to preorder from the Holiday Catalog a month early…but all customers will be able to order on September 4th!
Of course, my favorite is NO surprise to those of you who follow my blog. You KNOW I love snowman, so I had to use Stampin’ Up!’s Snowman Season for my card! AND…we have that fun new Snowfall Accents puff paint…so there is some on here, too!

Stampin’ Details:
- The base is 5-1/2 x 8-1/2 Thick Whisper White cardstock, scored at 4-1/4 and folded.
- A 3-1/2 x 4-3/4 piece of Real Red cardstock is added on top.
- On the 3-1/4 x 4-1/2 piece of Balmy Blue cardstock, a 3-1/4 wide strip of Whisper White was torn to give me a snowbank. Some Light Pool Party Blends was used for the shadow.
- The top portion of the Balmy Blue was stamped with the snowflakes in Snowman Season and Whisper White Craft Ink.
- The Snowfall Accents Puff Paint was dotted on the background and lined across the “snow” and then heated with the Heat Gun to make it puff! SOOO fun to watch it!
- The snowman was stamped with Memento Black Ink on scrap Whisper White and punched with the Snowman Builder Punch. His hat was stamped with Memento Black Ink and colored with the Light Basic Black and Dark Smoky Slate Stampin’ Blends. The flower with Real Red and leaves with Old Olive. A gold Holiday Rhinestone was put in the center. The nose colored with Pumpkin Pie and cheeks with Flirty Flamingo Blends. They were popped up on the front with Stampin’ Dimensionals.
- Thee snowman arms were punched from Early Espresso cardstock.
- Let it Snow was stamped with Memento Black Ink and punched with the Timeless Label Punch, then added to the front with Stampin’ Dimensionals.
- A couple of the red Holiday Rhinestones were added next to the greeting.

Isn’t that FUN????? I love it! Next up on our blog hop is our Create with Connie and Mary website, then on to creative Mary Brown, or head backwards to see Melissa’s fabulous card!


Ghosts and bats and cats, oh my! The OH MY FRIGHT COLLECTION will kick off your Halloween season with sweet and spooky images! Create layers of scary fun with a twisted tree and add cats, bats, a spiderweb, a witch's hat and other accessories to decorate your cards, tags, scrapbook pages and other crafty projects! Finish with a playful Halloween greeting! We've combined the OH MY FRIGHT BUNDLE and the magical patterns in the FRIGHTFULLY FUN 12x12 DESIGNER PAPER! You'll get step-by-step tutorials for FOUR cards and TWO decorated White Gable Box ideas in our OH MY FRIGHT COLLECTION! See more details HERE!

The SIMPLY LEAVES PUNCH BUNDLE can be used for ANY season! Follow our card journey through Spring, Summer, Fall and Winter using this versatile stamp set and punch! The patterned leaves will add natural detail and texture on your cards and projects, then add one of the simple greetings to finish. We've combined the SIMPLY LEAVES PUNCH BUNDLE and the garden neutral patterns in the VALLEY OF BLOOM 12x12 DESIGNER PAPER! You'll get step-by-step tutorials for EIGHT cards...two card ideas from each season...in our SIMPLY LEAVES CARD COLLECTION! See more details HERE!

Create wonderful dimensional poinsettias in a variety of sizes with the PRETTY POINSETTIA BUNDLE! The dies cut and emboss at the same time for lots of detail and texture. The coordinating stamp images add fun seasonal greetings, sprigs and other festive touches to your cards and projects. We've combined the PRETTY POINSETTIA BUNDLE and the A STITCHED SEASON 12x12 DESIGNER PAPER for a traditional holiday look you'll love! You'll get step-by-step tutorials for SIX projects...FOUR cards and TWO favors in our PRETTY POINSETTIA COLLECTION! See more details HERE!
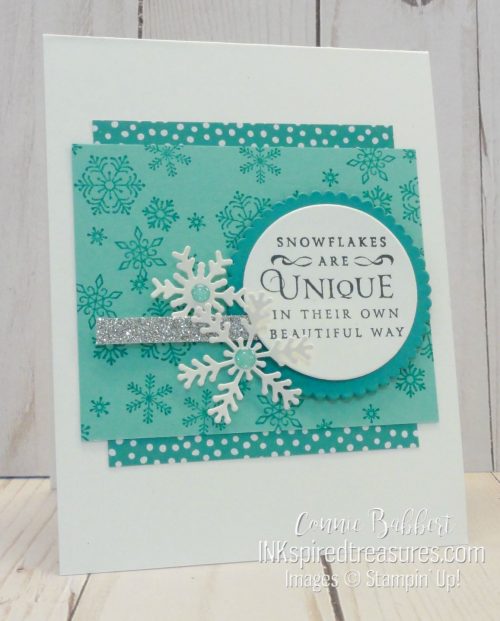
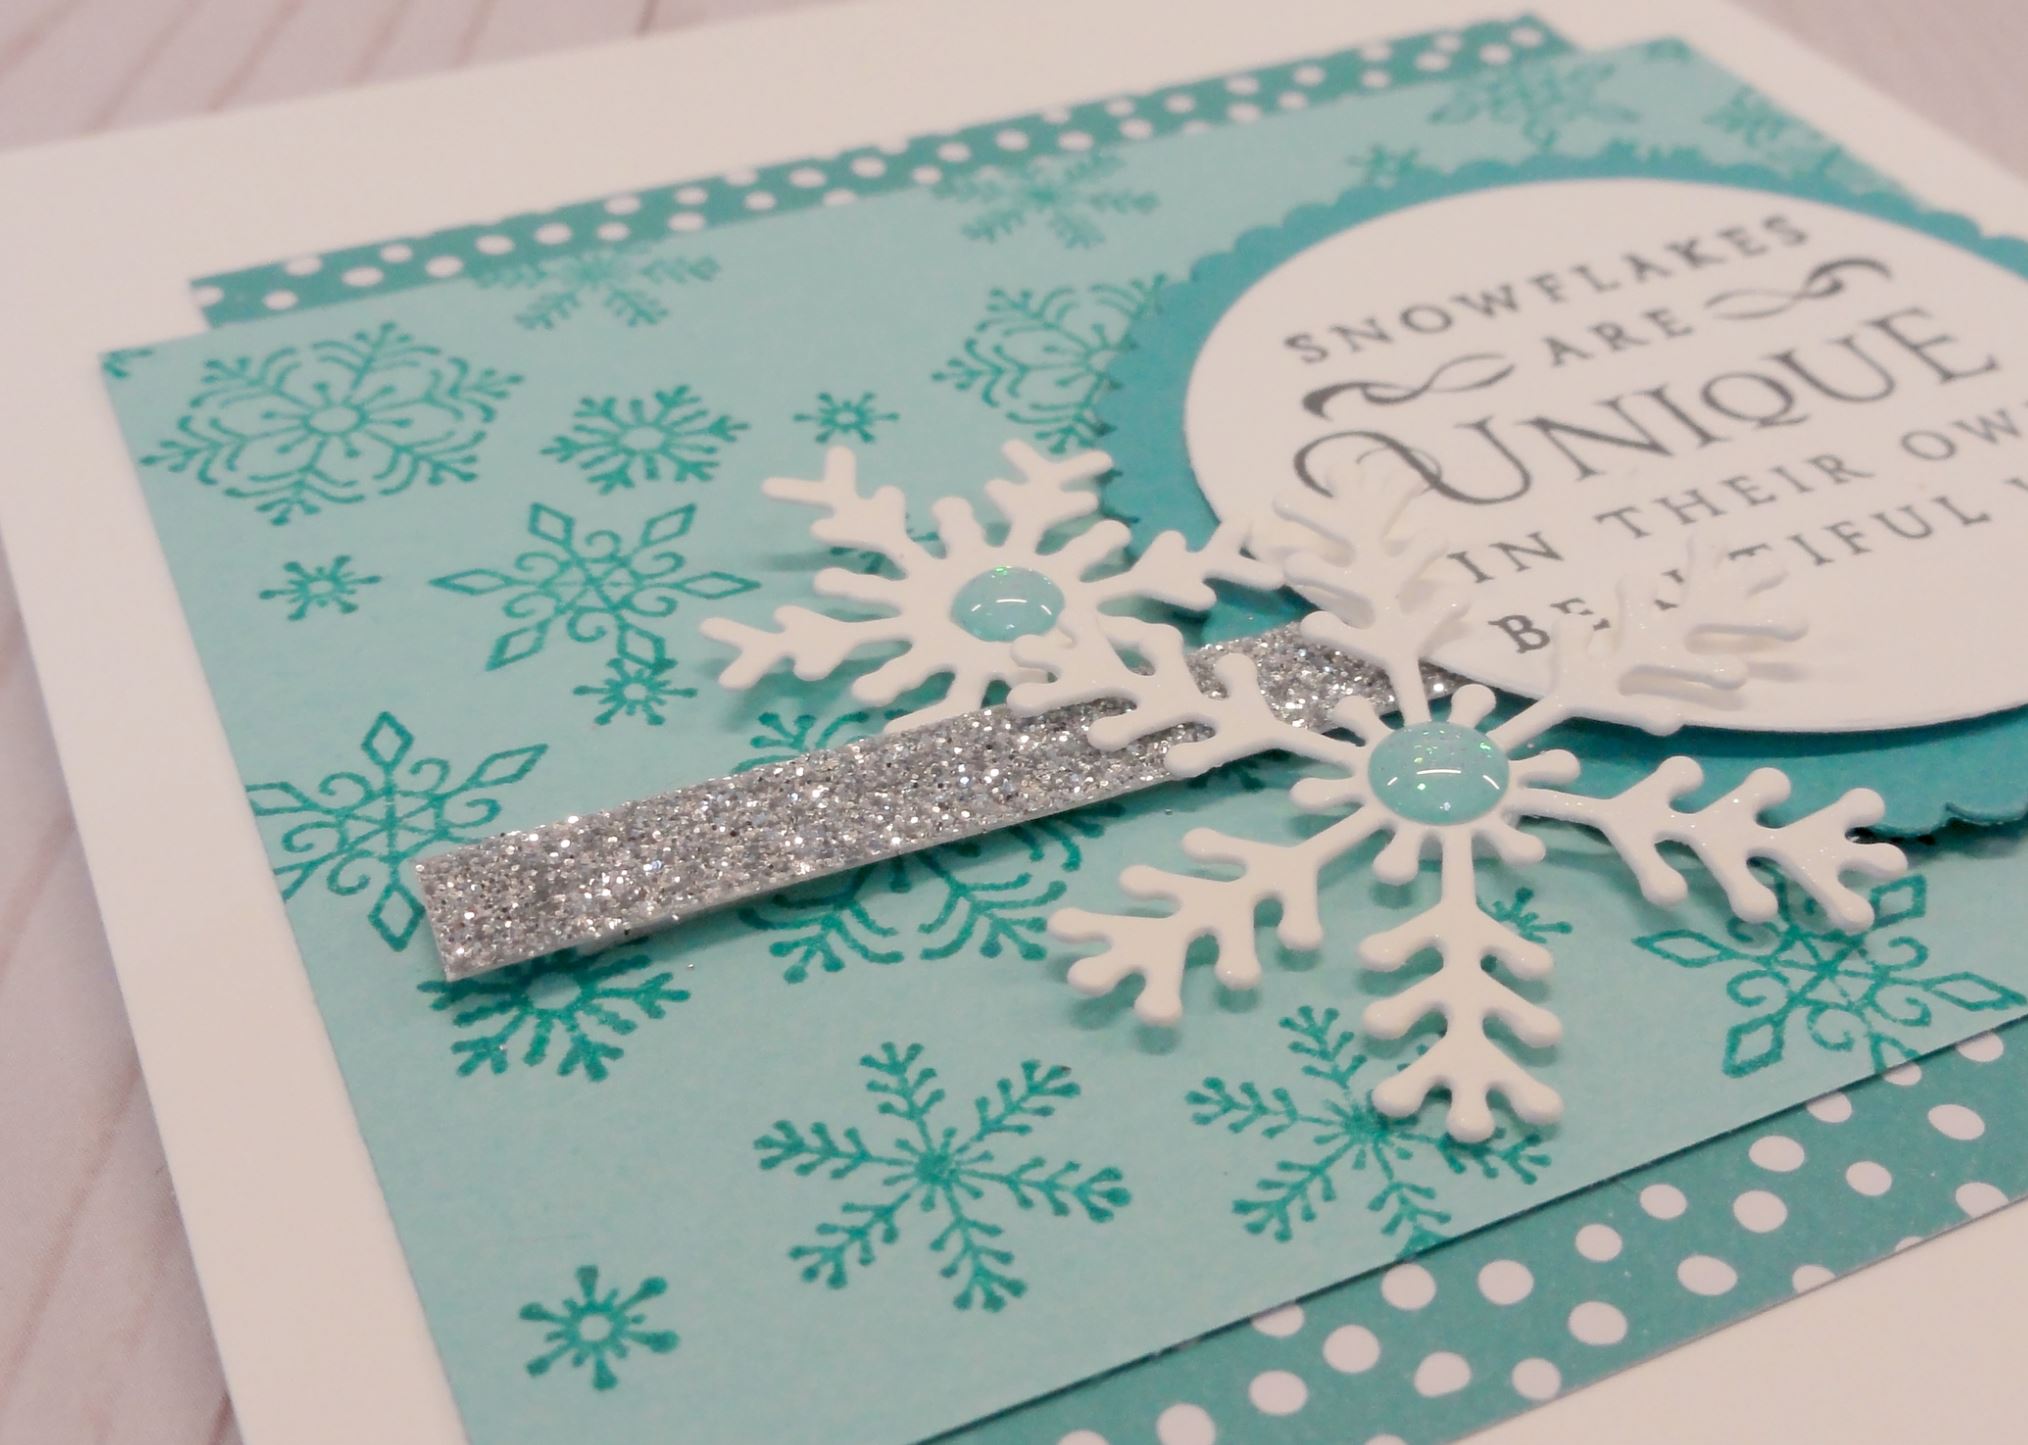
 I really like this card…in fact, it is a SERIOUS contender for my Christmas card this year!