
This week’s Create with Connie and Mary Saturday Blog Hop theme is Easter favors! I seem to always wait until the last minute to do my table favors. This sweet little box designed by Brenda Quintana was just too cute not to recreate for this Easter favor blog hop!

DAFFODIL DAYDREAM
These little boxes are made from the label in the Hippo & Friends Dies (I know! I’m obsessed with these Dies right now!) and will hold quite a bit of candy! But I refused to go buy any Easter candy this soon. I will just EAT it and I’m trying to be good! I’ll wait until the day before Easter and grab something for these boxes, then make sure none stay at my home! lol!

Stampin’ Details:
- Two of the largest shaped labels in Hippo & Friends Dies were cut from So Saffron cardstock for the top and bottom. They were embossed with the Painted Texture Embossing Folder.
- The top side of the box is 2 x 10⁻³/8 Hand-Penned Designer Paper, scored at 3/8 on the short side and 3-1/4, 5, 8-1/4, 10 on the long side.
- The bottom side of the box is 2 x 10⁻¹/16 Basic White cardstock, scored at 3/8 on the short side and 4-7/8 and 9-3/4 on the long side, FLIP 180 degrees and then score at 2 and 6-7/8.
- Fold all the score lines, adhere the short tab to the opposite of each and then add the DSP to the top label and the Basic White to the bottom label.
- Add 1-3/4 x 3-1/4 piece of matching DSP to bottom of Basic White box to finish the bottom on the inside.
- The daffodil from Daffodil Day was stamped on scrap Basic White with Memento Black Ink and colored with So Saffron, Daffodil Delight, Old Olive and Pumpkin Pie Stampin’ Blends. It was cut with the Daffodil Dies.
- The Easter sentiment was stamped with Memento Black Ink on scrap Basic White, then cut with the small Hippo & Friends Die. They were added to the top with Stampin’ Dimensionals.
- A trio of Matte Decorative Dots were added to the background.

Here are a few photos of the steps:


Well, only about 15 more of these to make for Easter dinner! I think I’ll do them up in a variety of Easter egg colors! Great way to use up some retiring designer paper…you can get 6 from each 12×12 sheet! OK, next up on our blog hop is our Create with Connie and Mary website, then on to creative Mary Brown, or head backwards to see Melissa Davies’ fabulous project and see what everyone did with this challenge!


The SIMPLY LEAVES PUNCH BUNDLE can be used for ANY season! Follow our card journey through Spring, Summer, Fall and Winter using this versatile stamp set and punch! The patterned leaves will add natural detail and texture on your cards and projects, then add one of the simple greetings to finish. We've combined the SIMPLY LEAVES PUNCH BUNDLE and the garden neutral patterns in the VALLEY OF BLOOM 12x12 DESIGNER PAPER! You'll get step-by-step tutorials for EIGHT cards...two card ideas from each season...in our SIMPLY LEAVES CARD COLLECTION! See more details HERE!

Create wonderful dimensional poinsettias in a variety of sizes with the PRETTY POINSETTIA BUNDLE! The dies cut and emboss at the same time for lots of detail and texture. The coordinating stamp images add fun seasonal greetings, sprigs and other festive touches to your cards and projects. We've combined the PRETTY POINSETTIA BUNDLE and the A STITCHED SEASON 12x12 DESIGNER PAPER for a traditional holiday look you'll love! You'll get step-by-step tutorials for SIX projects...FOUR cards and TWO favors in our PRETTY POINSETTIA COLLECTION! See more details HERE!
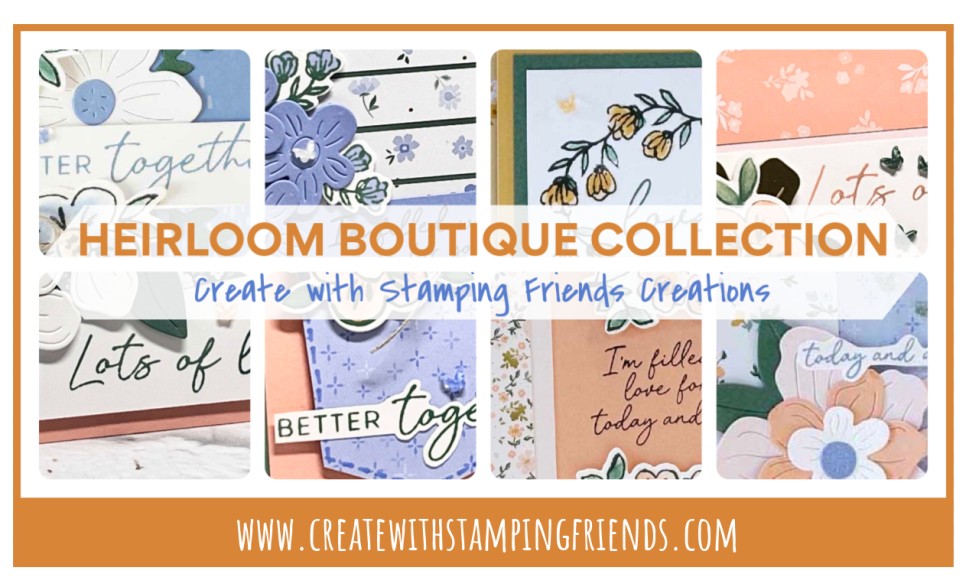
Bring your most meaningful memories to life with the HEIRLOOM BOUTIQUE BUNDLE. You’ll love how the coordinating stamps and dies add delicate florals, layered details, and heartfelt sentiments to your cards, scrapbook pages, and handmade gifts. These timeless designs will help you turn every project into a keepsake to share and cherish. We've combined the HEIRLOOM BOUTIQUE BUNDLE and the BLOOMS BOUTIQUE 12x12 DESIGNER PAPER for a soft artistic look! You'll get EIGHT step-by-step tutorials for EIGHT cards in our HEIRLOOM BOUTIQUE COLLECTION! See more details HERE!

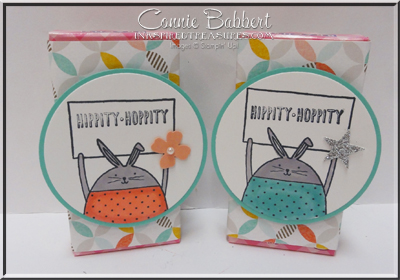


 Stampin' Up!'s Level 2 hostess set, Picnic Parade, is one of my favorites, but I realized that I hadn't really used the cute stamps in it much! So, at the stamping retreat, I made up some little favors for my downline and customers who attended. I also made some as my Stamp Club order favors this month. They are pretty quick to put together. The watercoloring probably took the longest. Inside is a nice Chocolate Crispy Bunny!
 I stamped the bunny from Picnic Parade in Basic Brown Classic Ink and watercolored with Stampin' Write Markers in Brocade Blue, Certainly Celery, Going Gray and Pretty in Pink. I punched it with the Wide Oval Punch. I layered it on another oval made with the Sizzix Ovals Dies. I placed it above the ribbon on the front.