
It’s Saturday and time for our Create with Connie and Mary Blog Hop. This week our theme is “Texture Time”. We are to feature a type of texture…embossing folder, paste,… [Read More]
Create with Connie and Mary
CCMC811 – Fluffiest Friends

It’s Thursday and you know that means it is time for a Create with Connie and Mary Thursday Challenge. It’s another great sketch challenge this week! I love sketches as… [Read More]
CS134 – Everyday Details
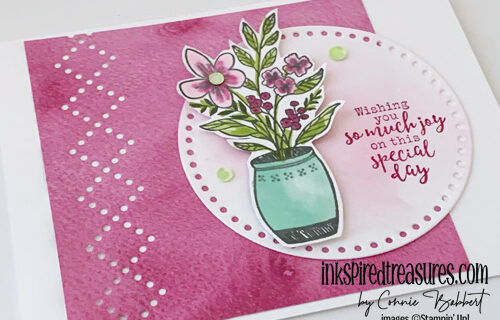
Welcome to Create with Connie and Mary’s Creatively Simple Challenge! Each month Mary and I will pick a theme for our simple cards. This month the theme is “Birthday” cards. … [Read More]
IM325 – Excellent Eggs

Welcome to our Create with Connie and Mary Inspiration Monday challenges. This week’s inspiration challenge is a fun Easter egg home decor piece! EXCELLENT EGGS Yep…just had to use my… [Read More]
Saturday Blog Hop – Peek-a-boo Cards
It’s Saturday and time for our Create with Connie and Mary Blog Hop. This week our theme is “Peek-a-boo cards”. We are showing different varieties of Peek-a-boo cards this week! … [Read More]
CCMC810 – Translucent Florals
It’s Thursday and you know that means it is time for a Create with Connie and Mary Thursday Challenge. What a pretty color combination we have for you this week…perfect… [Read More]
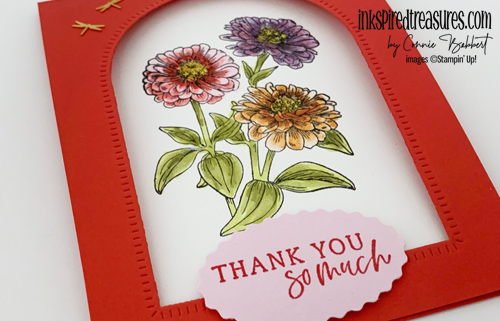
CS133 – Simply Zinnia

Welcome to Create with Connie and Mary’s Creatively Simple Challenge! Each month Mary and I will pick a theme for our simple cards. This month the theme is “Birthday” cards. … [Read More]
IM324 – Perennial Postage
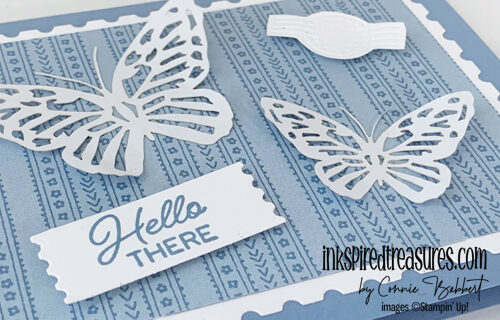
Welcome to our Create with Connie and Mary Inspiration Monday challenges. This week’s inspiration challenge is a pretty stamp image! PERENNIAL POSTAGE Of course, using the Perennial Postage Dies were… [Read More]
