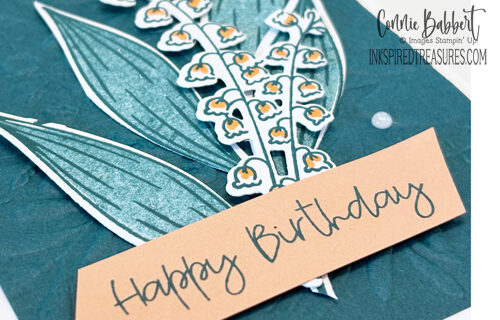
Our Creatively Simple theme for the month of May is called “Botanicals”! LILY OF THE VALLEY Another chance to use my Lily of the Valley bundle! I really am surprised… [Read More]
IM438 – Cutest Crew
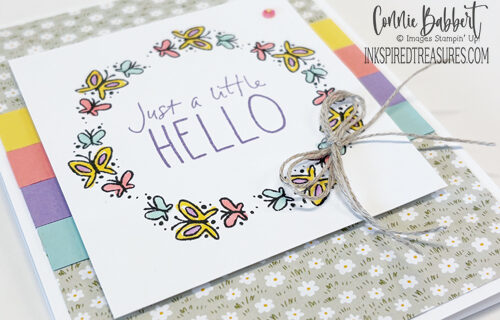
Welcome to our Create with Stamping Friends Inspiration Monday challenges. This week’s inspiration is butterflies! CUTEST CREW I looked and looked for butterflies in my current stash of stamps. These… [Read More]
Saturday Blog Hop – Animal Kingdom

It’s Saturday and time for our Create with Stamping Friends Blog Hop. This week’s theme is “Animal Kingdom”! What fun! WOOLLY FRIENDS I’ve made this little box for a couple… [Read More]
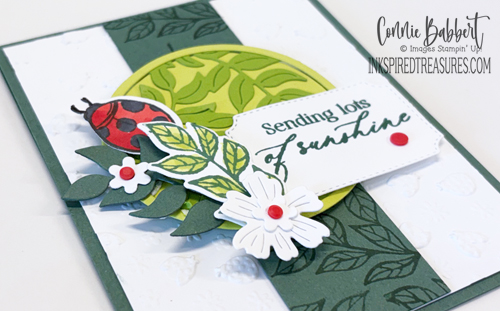
CSF921 – Artisan Sketched Garden
It’s Thursday and time for our Create with Stamping Friends challenge! We have a fun sketch challenge this week! ARTISAN SKETCHED GARDEN I had SO many different ideas on how… [Read More]
CS246 – Lily of the Valley

We have a new Creatively Simple theme for the month of May called “Botanicals”! LILY OF THE VALLEY This Lily of the Valley bundle is so delicate looking! I couldn’t… [Read More]
IM437 – Sunset Coast
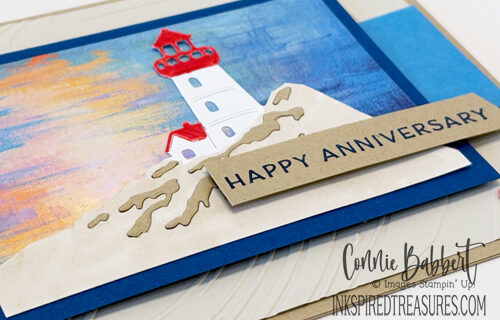
Welcome to our Create with Stamping Friends Inspiration Monday challenges. This week’s inspiration is a sunset lighthouse picture! SUNSET COAST Of course, it was pretty obvious what stamp bundle I… [Read More]
Saturday Blog Hop – Sprigs & Twigs
It’s Saturday and time for our Create with Stamping Friends Blog Hop. This week’s theme is “Sprigs & Twigs”. Lots of choices for this theme! SPRINGTIME SCENES I thought all… [Read More]
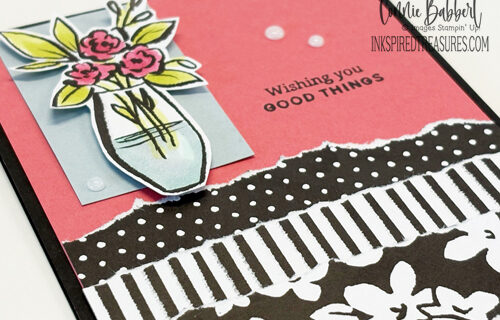
CSF920 – Boutique Blossoms
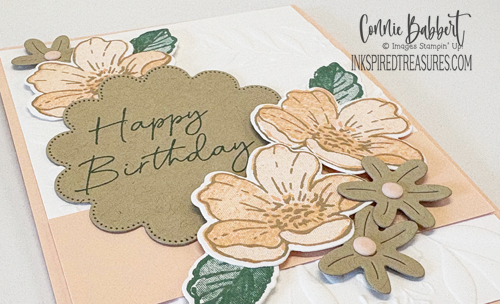
It’s Thursday and time for our Create with Stamping Friends challenge! We have a pretty color challenge this week and it put me in mind of flowers! BOUTIQUE BLOSSOMS I… [Read More]
